Perform the following steps to do a Claim Run for EDI claims.
- From the Claims menu on the left side of the screen, select Generate Claims.
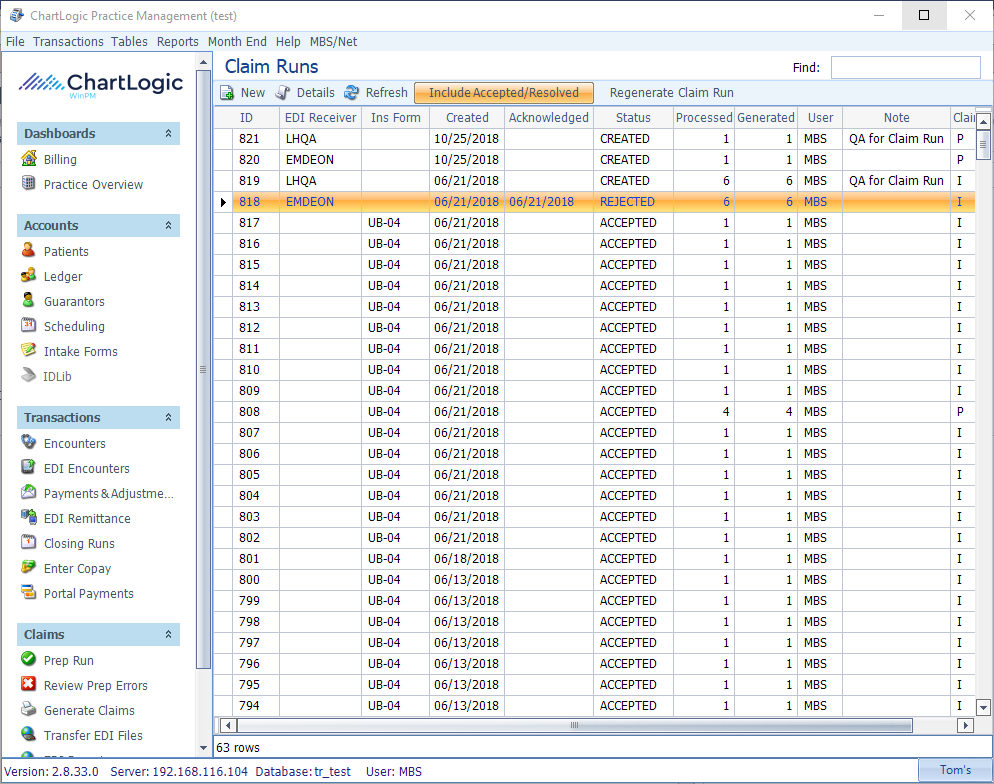
The Claim Runs list will appear on the right, as shown below.

- Click New on the toolbar.
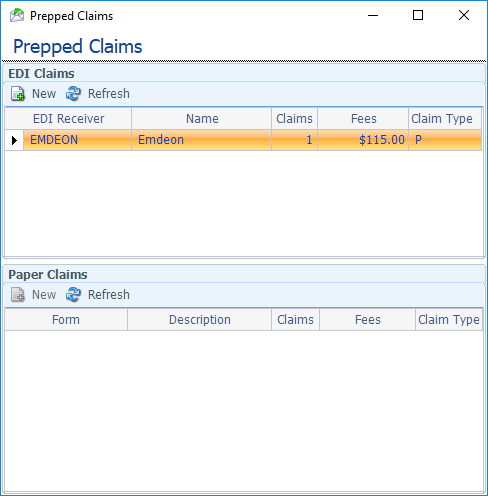
The Prepped Claims screen will appear, showing the available sets of Claims, separated into EDI Claims (by receiver) on top and Paper Claims on the bottom, as shown below.

- Select the row of the set you wish to process in the EDI Claims section and click New.
A Claim Run dialog box with progress bar will appear, as shown below.

- Click Start.
The Claim Run occurs in the background and takes several minutes. Do not close the dialog box until it finishes (you may minimize it and work on something else while it runs). The progress bar shows the Claim Run ID and the percentage finished at any given moment.

When it reaches 100%, the button will change from Running to Done, as shown below.

NOTE: IF THE CLAIM RUN SAYS “DONE” AT ANY PERCENTAGE LESS THAN 100%, A SERIOUS ERROR HAS OCCURRED. CALL THE HELP DESK IMMEDIATELY. DO NOT TRY TO REPEAT THE CLAIM RUN.
- Click Done.
The newly created Claim Run will appear on the Claim Runs list with the Status “Created.” The Processed column indicates how many claims were in the Prep Run. The Generated column indicates how many of these claims are included in the file generated in the Claim Run. These two numbers should be the same unless you suppressed some claims in the Prep Run.
Note: Ideally, you should not see anything on the Claim Runs list older than the previous run you did because they disappear from this list after they’ve been accepted by the clearing house. If you do see anything more than a few days old, verify with the clearing house that the EDI file transfer (see next step) went through.

