
Patient Exams
- Direct Message Report
- Human Readable CCDA
- Adding an Implant Device
- Vaccine Screen Changes
- Automatically Import Pharmacies
- Audit Log
- Viewing Secure Messages and requests in the EHR
- Clinical Note Types
- Previous Name and Address
- CCDA Export Subset of Patients
- Additional CCDA Export Data
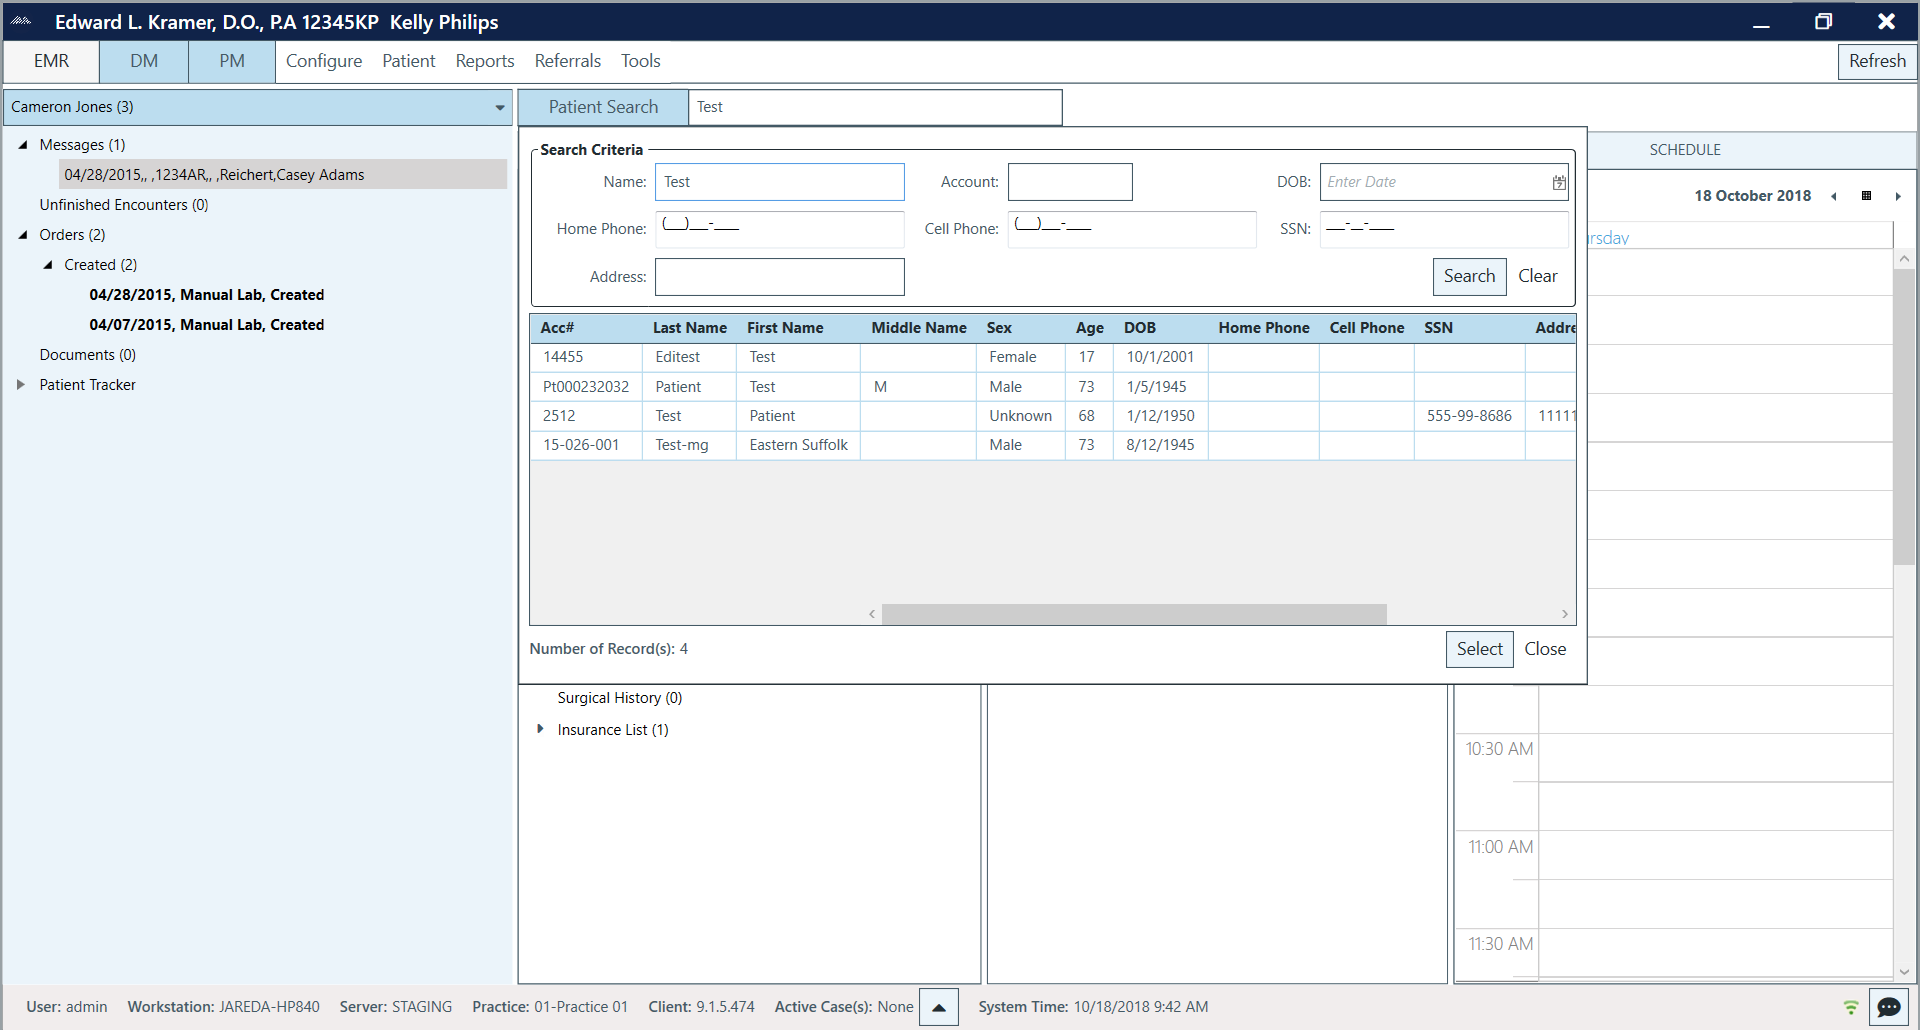
- Searching for Patients
- Managing Patient Information
- Patient Exams
- Schedule
- Flowsheets
- Patient Intervention and Health Maintenance Profiles
- Case Management
- Orders
- Sending and Receiving Messages
- Reports
- Dragon Naturally Speaking Voice Integration
- Vocabulary Editor
- Diagnosis Director
- Primary Care Features
- E/M Consultant
- Patient Tracker
- Referring Patients
- Referral Reply Letter
- Fax Viewer
- Legacy Audit Trail
- Error Log
- DataShare
- ICD-10 Setup & Training
- CCDA Data Export Guide
- Regulatory Report
Patient Exams
Exams are the center of every patient encounter. ChartLogic provides multiple ways to access patient exams for editing and review.
Creating Exams
To create a new exam:
- Select the patient from the Patient List on the ChartLogic Main Screen.
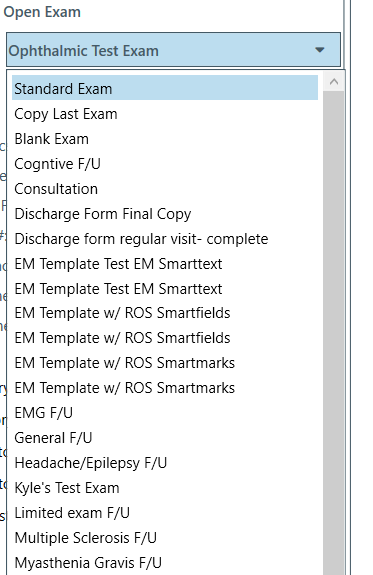
- Select exam template from the drop-down menu under Open Exam.
To open an existing exam from the ChartLogic Main Screen:
- Select the patient.
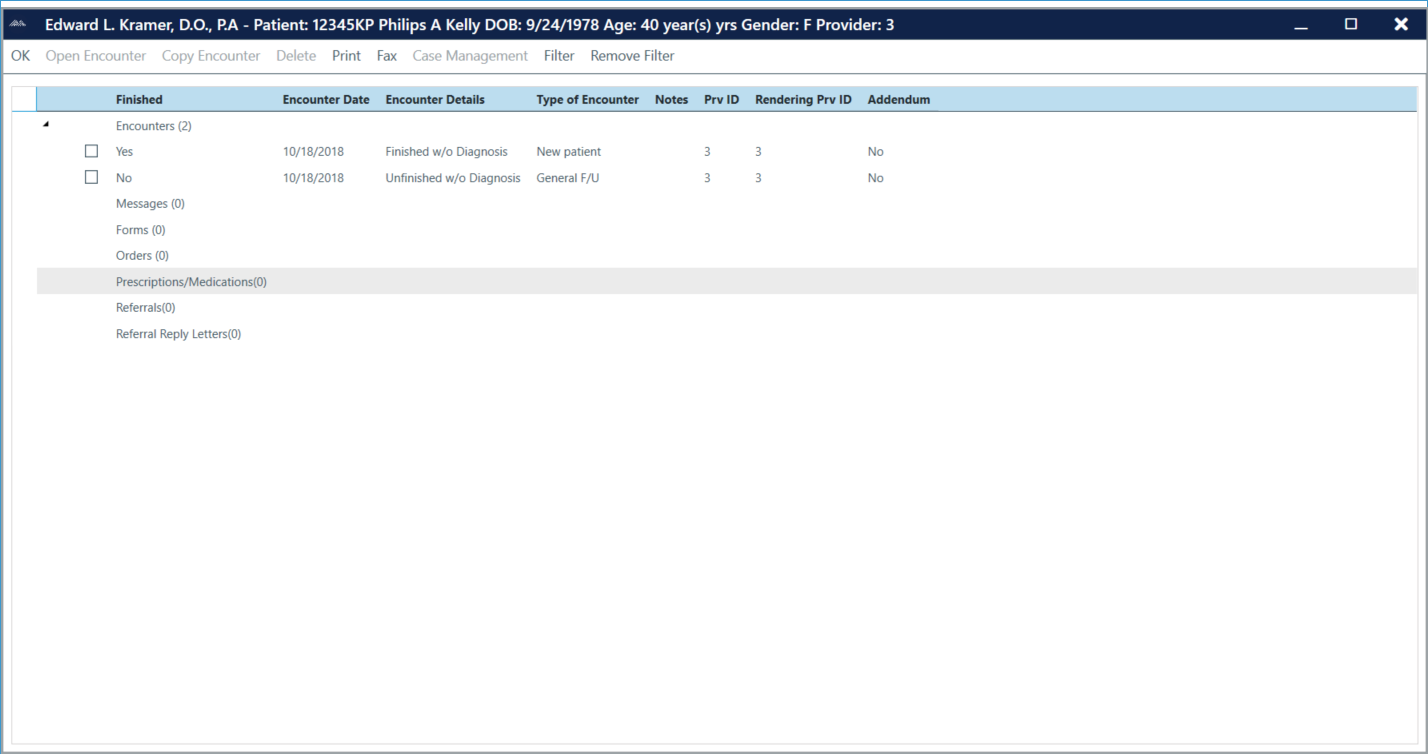
- In the Active Care section of the main screen, expand Encounters.

- Double-click the desired exam.
To open an existing exam from the Patient Chart window:
- Select the patient.
- Go to Patient > Patient Chart.
- Expand Encounters.
- Double-click desired exam OR single-click desired exam and then click the Open Encounter button.
To open an unfinished exam:
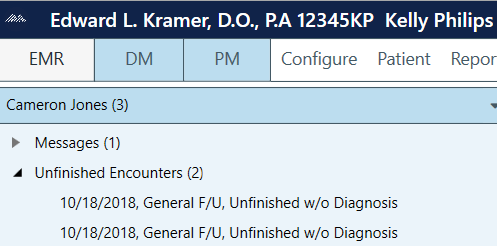
- Expand Unfinished Exams (left sidebar of ChartLogic Main Screen).
- Double-click desired exam.
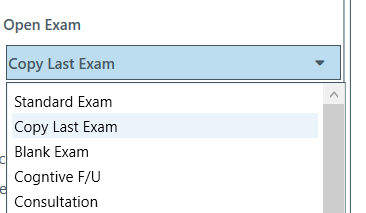
To copy the last exam:
- Select the patient.
In the drop-down menu under Open Exam, select Copy Last Exam.
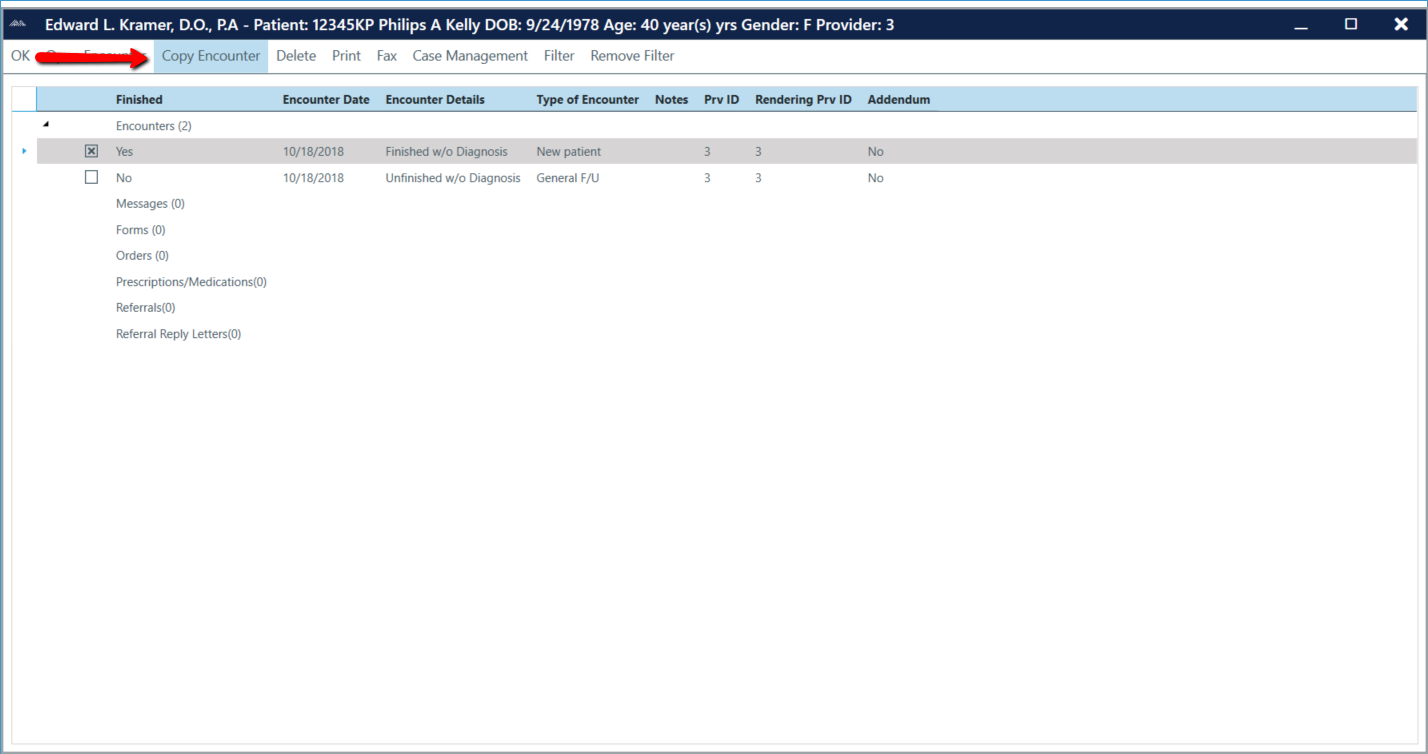
To copy any exam:
- Select the patient.
- Go to Patient > Patient Chart.
- Click on Exams.
- Select exam to be copied and then click on the Copy Encounter button.
Adding an Addendum to an Exam
Addendums are used to add information to an exam that is saved and finished.

To add an addendum to an exam:
- Click the area of the exam you would like to add the addendum to.
- Go to Insert > Addendum, click on Addendum on the left-hand sidebar, or voice command “addendum.”
- Enter the information to be added to the exam.
- Click the (+) Add to Note The information will be added to the section of the exam highlighted and will include an Addendum header with the date it was added.
Note: You can change the default placement of addendum’s for the provider by going to Configure > Options > User Accounts > [Your Provider Name] > Addendum Placement = Top/Bottom.
Adding Dr. Notes
Dr. Notes can be added to any patient from the ChartLogic Main Screen. When added to the Dr. Notes field on the Main Screen will flash to let you know a note has been documented.

To view/add confidential information from the ChartLogic Main Screen:
- Double-click on Notes under the Active Care section.
- View, edit, and/or add information.
- Click Clear to clear all information, or click Save and Exit to save changes.
Using Illustrator in the Exam Screen
ChartLogic Illustrator allows users to add and edit images in the exam.

To add an image to the exam:
- Go to Tools > Illustrator, or click on the Insert Bitmap at Cursor Screen icon at the top of the exam screen, or voice command “illustrator.”
- Go to File > Open to browse an image to insert into exam.
- The image can now be edited, annotated, or altered based on the menu options listed below.
- Click Save to add the image to the exam at the cursor position.
- Click No when prompted to add image as a Guidline.
To edit an image in an exam:
- Double-click the image in the exam.
Note: An image in a Saved and Finished exam cannot be edited.
- The image can then be edited, annotated, or altered.
- Click Save to add changes to the image.
ChartLogic Illustrator Menu
File
- Open: Allows user to select image to insert into Illustrator.
- Save: Saves image and returns user to exam screen. Image will be inserted into exam.
- Print: Prints image.
- Exit: Allows user to save changes and exit Illustrator, cancel changes and exit Illustrator, continue working in Illustrator, or cancel changes and continue working in Illustrator.
Edit
- This menu allows the user to edit, copy, and paste images in illustrator.
Viewer
- This menu allows the user to adjust the image view to centered or snap rotation.
Annotations
- Clear: Clears all annotations.
- Flip: Flips the selected annotation. Options are horizontal, vertical, horizontal pivot, and vertical pivot.
ChartLogic Illustrator Icons
Icons across the top of the screen:
- Cancel: Gives user the option to save changes and exit Illustrator, cancel changes and exit Illustrator, continue working in Illustrator, or cancel changes and continue working in Illustrator.
- Save: Saves image and returns user to exam screen. Image will be inserted into exam.
- Rotate 90: Rotates image 90 degrees (clockwise).
- Rotate -90: Rotates image 90 degrees (counterclockwise).
- Zoom: Allows user to zoom in and out on the screen, using either the (+) and (-) icons or the zoom scroll bar.
- Actual Size: Resizes image to its actual size.
- Fit to Screen: Adjusts image to fill the entire screen.
- Print: Prints image.
Icons on the left-hand sidebar:
- Callout: Creates text box with adjustable arrow connected. This allows users to further explain a condition by typing comments in the text box and pointing the arrow to the area of the image being explained.
- Ellipse: Creates ellipsis of any shape, size, or color.
- Embedded image: Opens Windows folder from which user can select image to embed into Illustrator.
- Freehand: Freehand drawing tool (any color).
- Line: Draws a straight line.
- Rectangle: Creates rectangle of any shape, size, or color.
- Rubber Stamp: Creates adjustable “Top Secret” stamp.
- Text: Creates text box.
- Highlight: Highlights selected sections in text box.
Using SmartText in the Exam Screen
SmartText can help a provider complete an exam with only a few phrases or clicks of the mouse. Providers can preview the SmartText before inserting it into an exam.
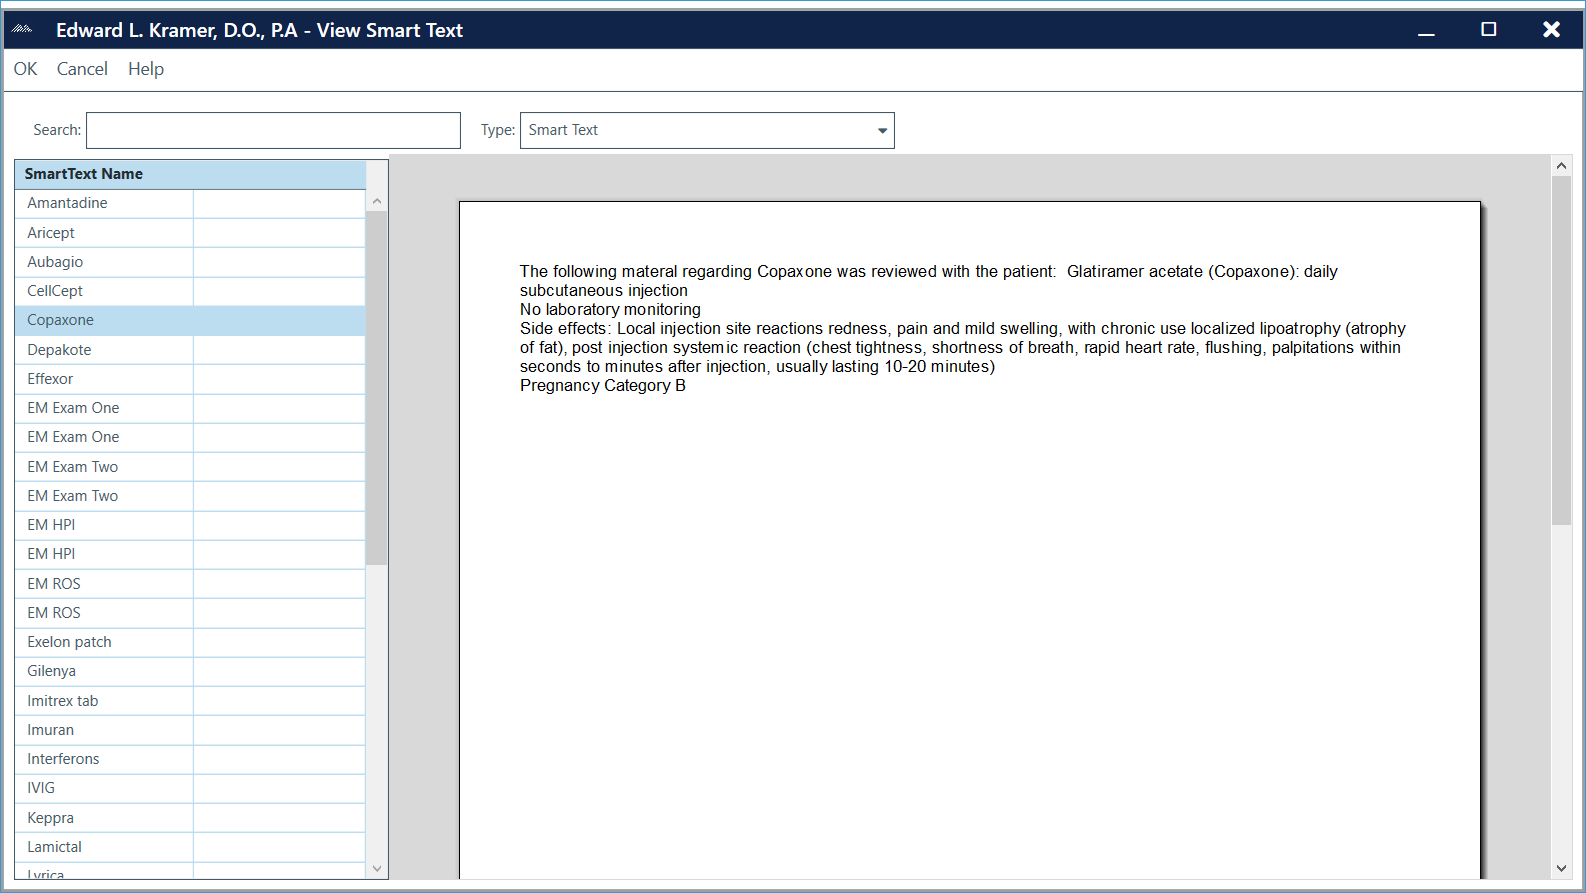
To insert SmartText into exam:
- Go to Insert > SmartText, or click on the SmartText button on the left-hand side bar, or voice command “smart text.”
- Select the SmartText either by voicing the name of the SmartText or by highlighting the SmartText and clicking OK. A preview of the SmartText will display in the window to the right.
Note: SmartText will insert at the location of the cursor when entering the SmartText screen.
To insert SmartText into exam using only voice:
- If you know the name of the SmartText you would like to insert, simply voice “Insert [name of SmartText].”
Note: SmartText are provider specific but can be shared among providers by copying templates to other providers.
Using Superbill in the Exam Screen
ChartLogic Superbill allows providers to associate billing codes with the patient encounter.
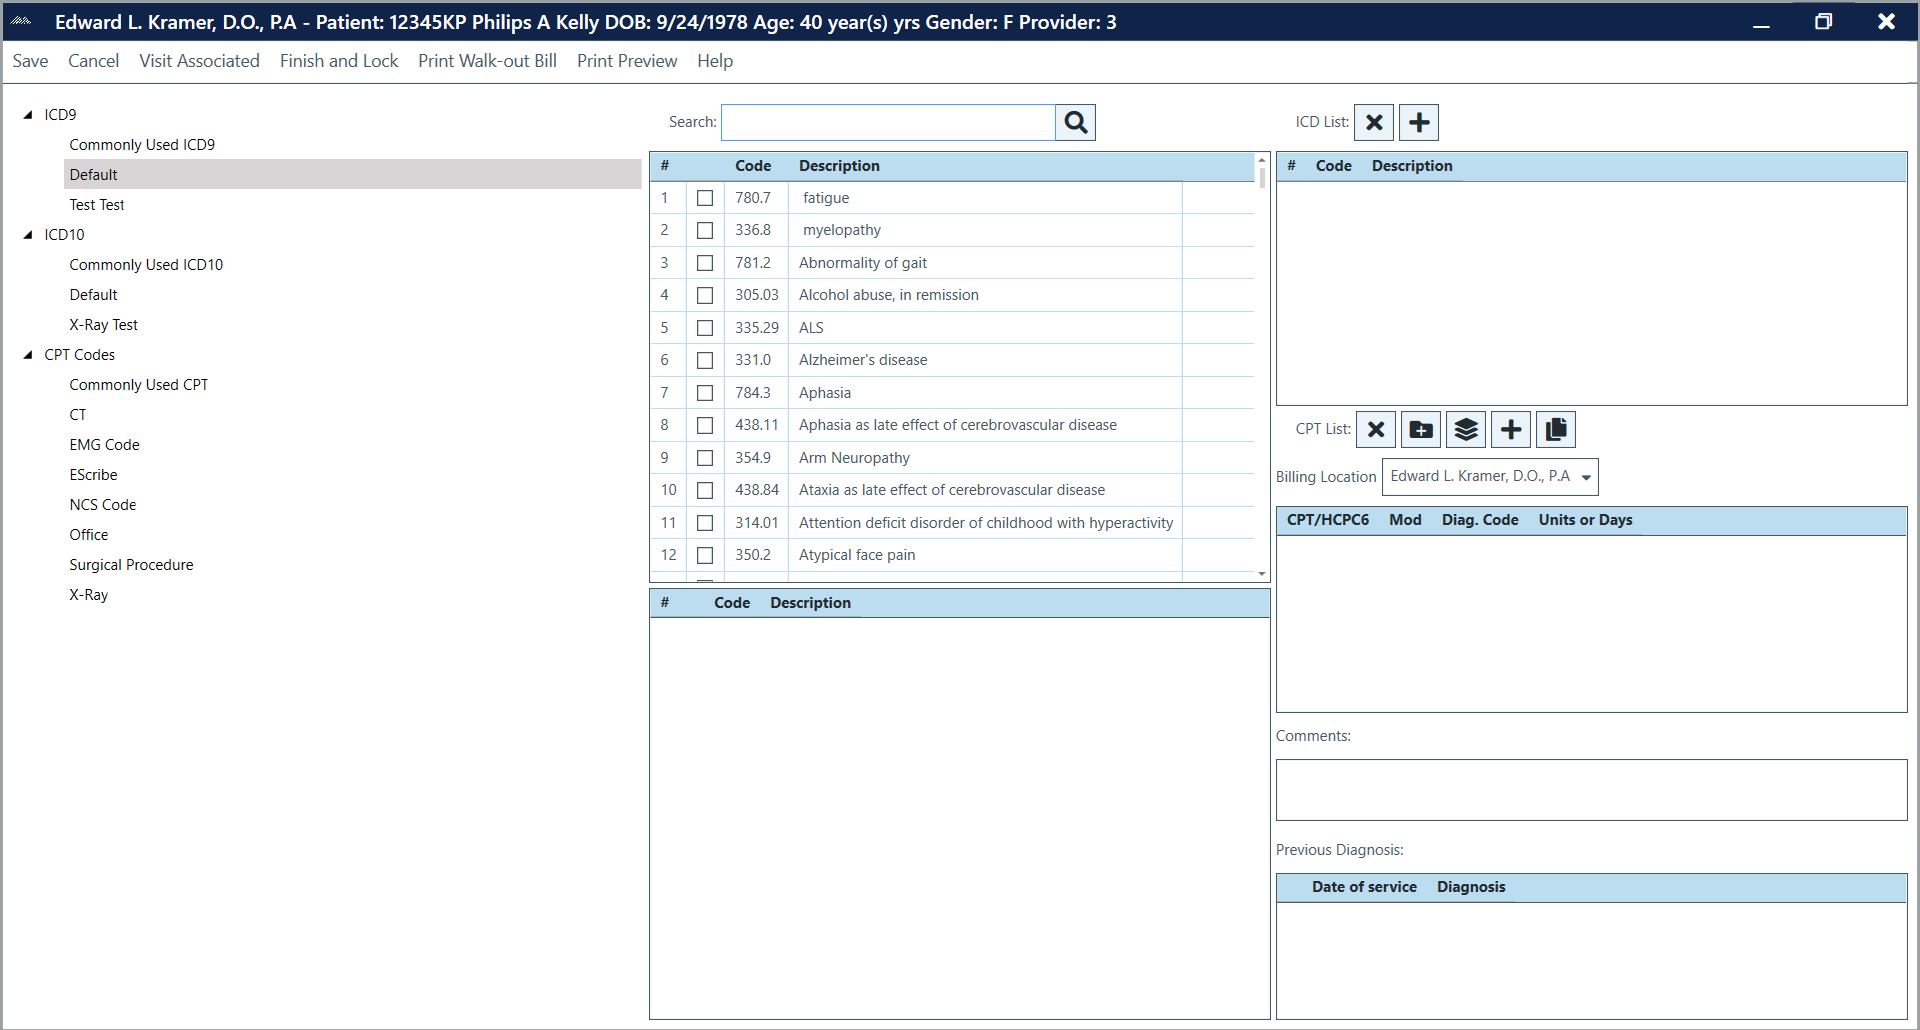
To access Superbill from the exam screen:
- Go to Billing > Superbill, or click the Superbill button on the left-hand sidebar, or voice command “superbill.”
To select ICD Codes within the Superbill screen:
- Check the pertinent diagnosis/diagnoses from the ICD list. Codes will appear under the ICD List to the right.
- Click Save to save changes and return to exam screen. ICD codes will appear under the Diagnosis heading.
To add an ICD code not listed in the clinic ICD list:
- In the Superbill screen, select the Add ICD icon above the ICD List.
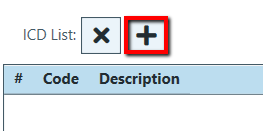
- Select the code(s) to be imported. Codes can be searched by numeric code or description.
- Choose the radio button to search by code or description.
- Type in the code or description you wish to search.
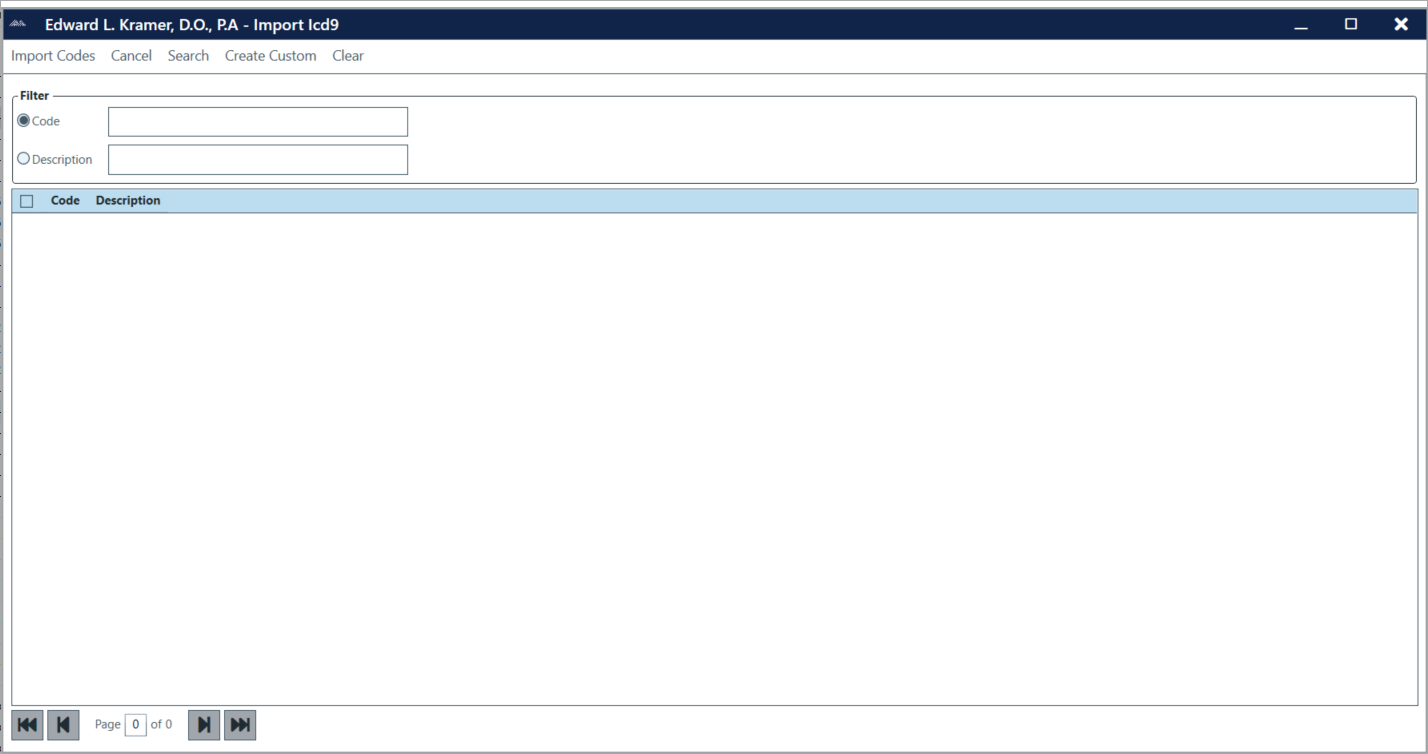
- Click Search.
Note: The description will be listed exactly as shown in the master ICD list. You may wish to change the description upon importing to a more voice-friendly format.
- Check mark the codes you wish to import to the Superbill.
- Click Import Codes.
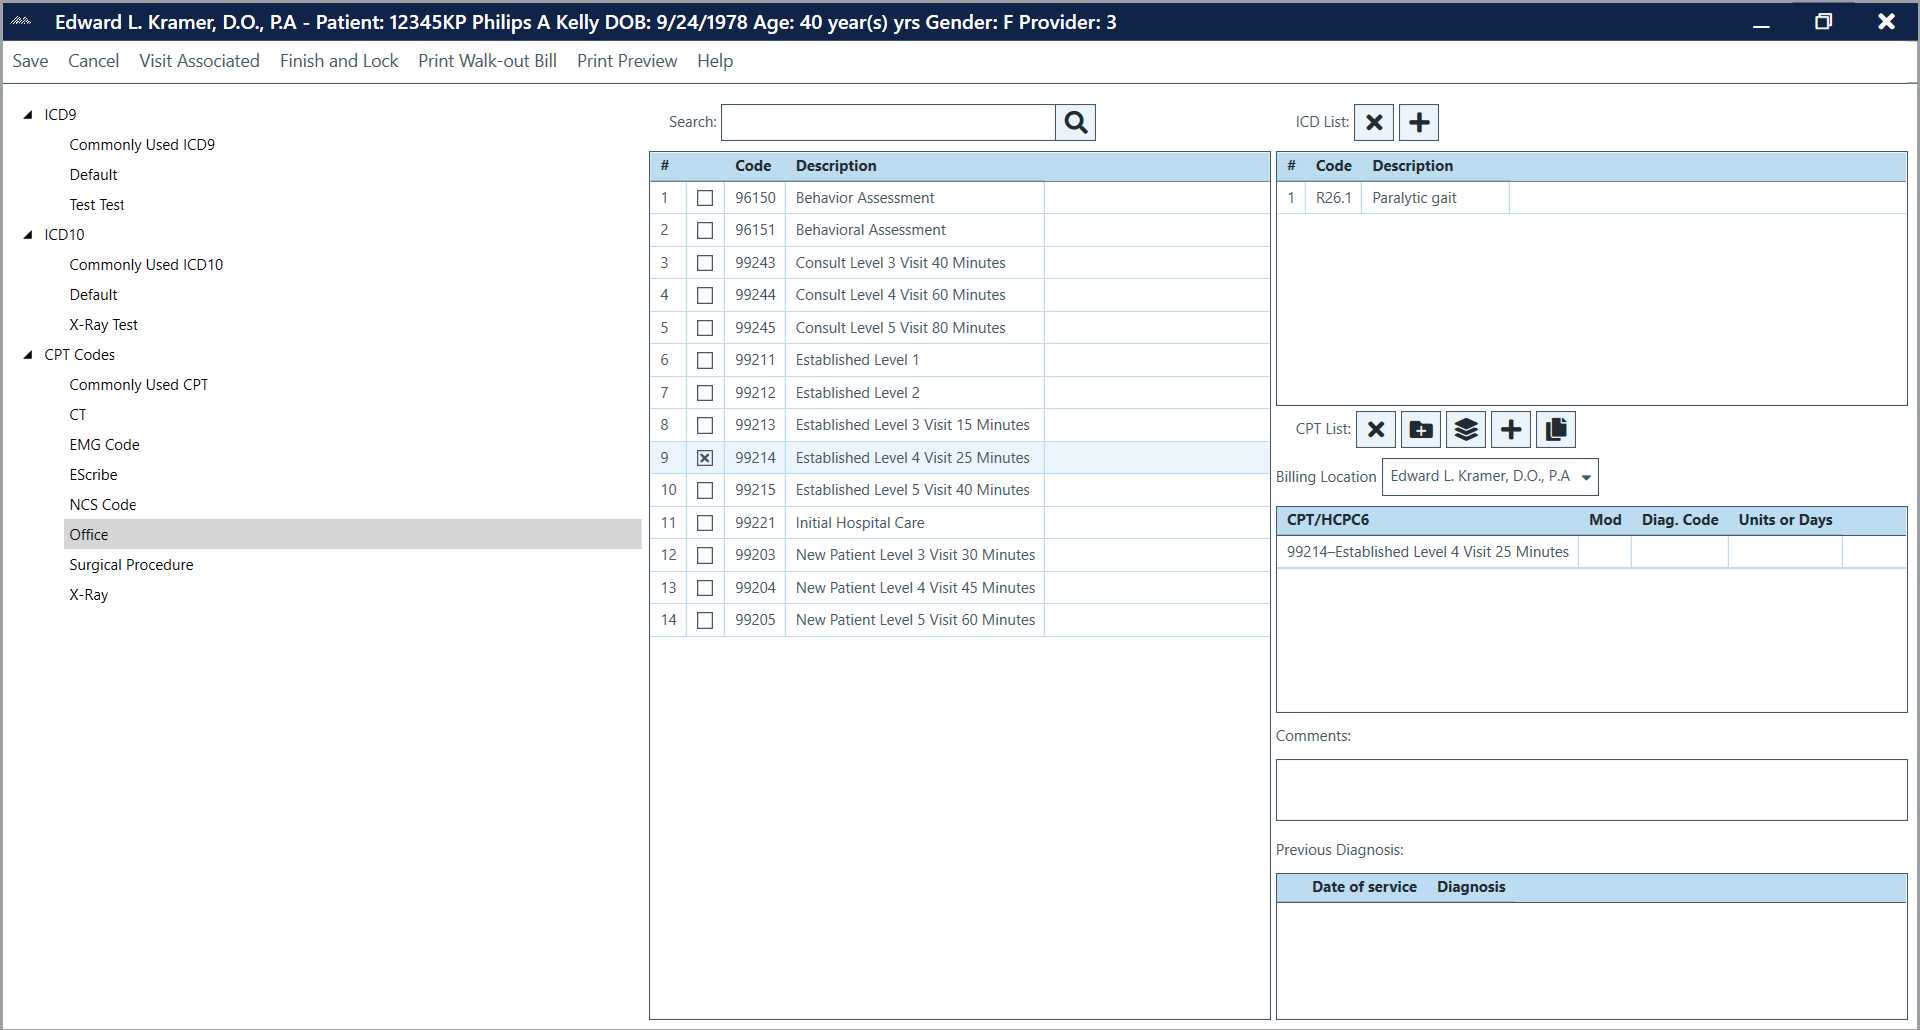
To select CPTs within the Superbill screen:
- Select the CPT code section and select the code(s) to apply to the exam. Codes will appear under the CPT List.
- To add a modifier to a code, Find the CPT code you wish to add the modifier to in the CPT List. Double click in the Mod field, and enter the modifier.
- Associate all diagnosis codes to all CPT codes by clicking on the Associate All Diagnoses with all CPTs icon.
- To associate a specific diagnosis code to a CPT code, click in the Code field and check the codes that apply.
- Click in the Units or Days field to enter units/days.
- Click Save at the top of the screen to return to the exam screen. CPT(s) will appear in CPT SmartField if in exam.
To add CPT codes not listed in the clinic CPT list:
- In the Superbill screen, select the pertinent CPT sub-section and then click the Add CPT icon next to the CPT List.
![]()
- Choose the radio button to search by code or description. Type in the code or description you wish to search.
- Click Search.
Note: If the code already exists in the clinic CPT lists, it will be duplicated.
- Check mark the codes you wish to import to the Superbill, Click Import Codes.
Note: The Print Walk-Out Bill at the top of the screen will print a bill to provide to the patient for billing insurance.
Using Patient Education
Patient education materials can be provided to the patient during the visit and a record of this association will be recorded in the exam.
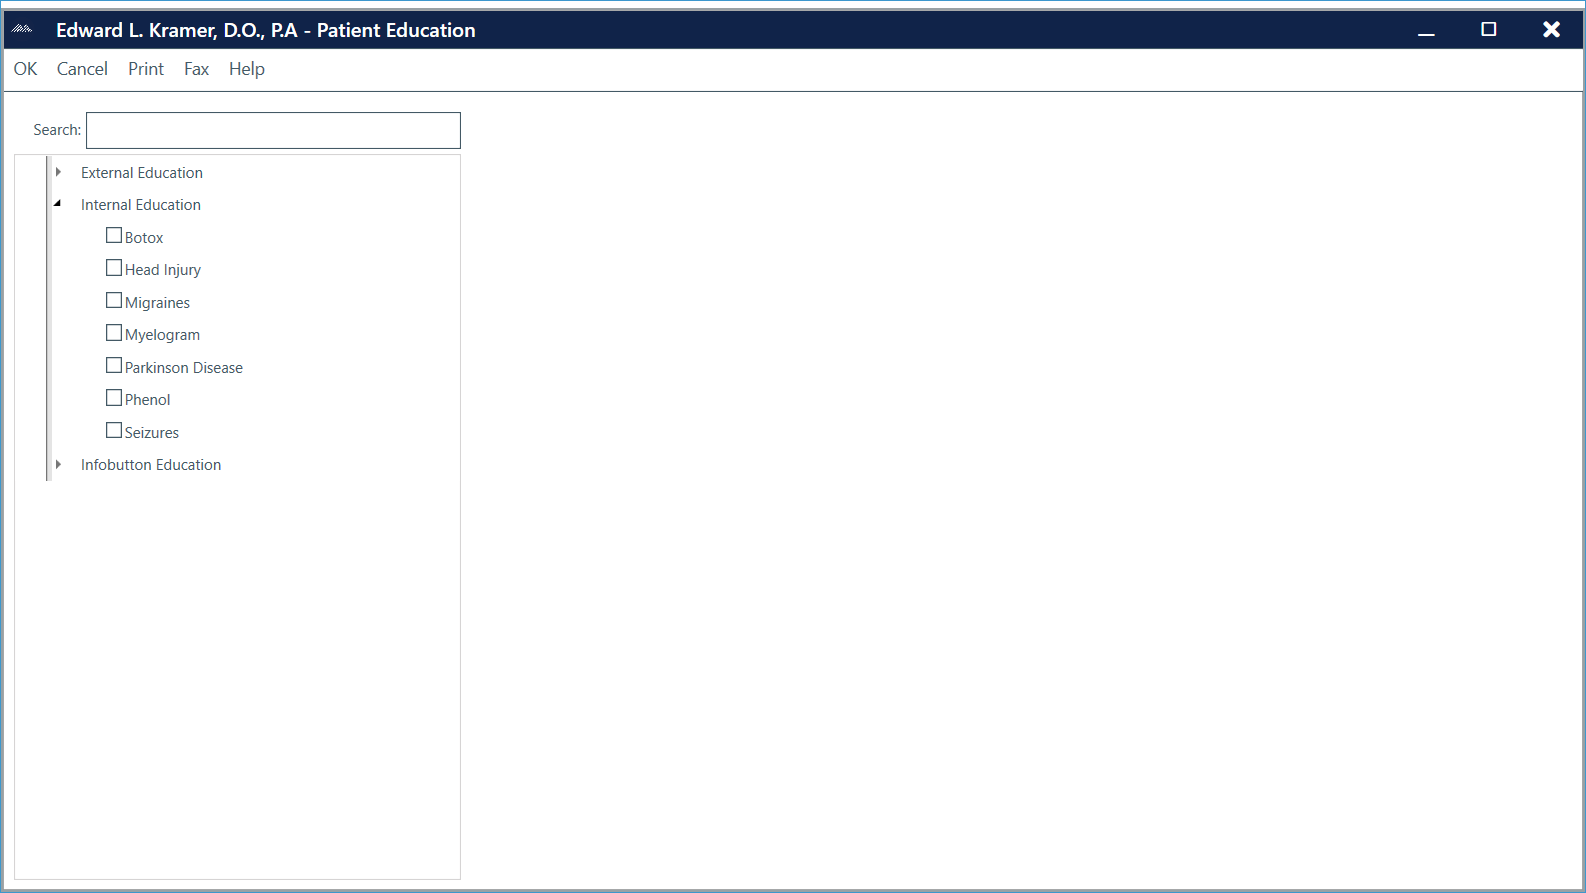
To use Patient Education in the exam screen:
- Click on the Patient Education button on the left sidebar or voice the command “patient education.”
- Select the desired patient education material from either the External Education or Internal Education list.
Note: External files must be a .doc, .pdf, or .txt file.
- Click on Print to print (optional).
- Click OK. A Patient Education Material(s) header will be added at the bottom of the exam with the date the information was provided.
To add patient education information as part of the exam text:
- Go to Insert > SmartText, click on the SmartText button on the left sidebar, or voice the command “smart text.”
- Select Education from the SmartText Type drop-down menu on the right of the screen.
- Select the desired patient education template.
- Click OK to insert the template at the cursor position.
Formatting Information in the Exam Screen
Formatting allows the user to change the formatting and look of an exam.

Note: Most formatting functions can be accessed via the icons on the Format Toolbar of the exam screen. For more formatting options, click on Format.
Format Menu
Edit
- Undo: Reverses actions in the exam.
- Redo: Redoes actions in exam.
- Cut: Cuts selections from the exam. (Ctrl + X)
- Copy: Copies selections in the exam. (Ctrl + C)
- Paste: Pastes selections into exam. (Ctrl + V)
- Delete: Deletes selections from the exam.
- Find: Finds selections in the exam. (Ctrl + F)
- Replace: Replaces found selections in the exam. (Ctrl + H)
- Select All: Selects the entire exam. (Ctrl + A)
View
- Normal Layout: Exam page displays from the left side of the screen.
- Centered Page Layout: Exam page displays in the middle of the screen.
- Control Character: Shows characters for actions such as paragraph and tab.
- Smart Mark: Changes view of SmartMarks (invisible, minimal, and maximum).
- E/M Toogle Color: Adds/removes color to E/M information.
- Timer: Displays timer.
- Zoom: Zoom can be adjusted anywhere from 10 to 400 percent.
Insert
- SmartFields: Opens screen for selecting SmartFields, SmartMarks, and flowsheets.
- Text: Opens folder for inserting text file into exam.
- Bitmap at Cursor Position: Opens ChartLogic Illustrator for inserting illustration into exam.
- Wave at Cursor Position: Opens ChartLogic Recorder for inserting voice file into exam.
- Page Break: Inserts a break in the exam to create a new sheet.
Format
- Character: Allows selection of font characteristics.
- Paragraph: Allows setup of line spacing and paragraph alignment.
- Bullets and Numbering
- Attributes: Allows user to select any of the below listed bullets or numbering in one screen.
- Increase Level: Tabs bullet to the right.
- Decrease Level: Tabs bullet to the left.
- 1,2,3: Inserts this outline format.
- A,B,C: Inserts this outline format.
- b.c.: Inserts this outline format.
- I,II,III,IV: Inserts this outline format.
- i,ii,iii,iv: Inserts this outline format.
- Bullets: Inserts bullets.
- Tabs: Allows setup of tab stops and alignment.
- Styles: Allows setup of styles.
- Image: Allows user to edit image.
Table
- Insert Table: Opens window to select the number of rows and columns to add to a table and insert into an exam.
- Insert Table Column to the Left: Inserts column into the table left of the cursor position.
- Insert Table Column to the Right: Inserts column into the table right of the cursor position.
- Insert Table Row Above: Inserts a row into the table above the cursor position.
- Insert Table Row Below: Inserts a row into the table below the cursor position.
- Delete Table: Deletes the table where the cursor is positioned.
- Delete Table Column: Deletes the column of the table where the cursor is positioned.
- Delete Column Row: Deletes the row of the table where the cursor is positioned.
- Grid Lines: Shows the grid lines of the table where the cursor is positioned.
- Properties: Allows user to set the properties of the table where the cursor is positioned.
Note: Format icons viewed in the exam screen are selected in Configure > Options > User Accounts > Providers/Users > (Users Name) > Format Bar.
Connect
1220 E 7800 S, Floor 3
Sandy, UT 84094
Toll-Free (888) 337-4441
