
ICD-10 Setup & Training
- Direct Message Report
- Human Readable CCDA
- Adding an Implant Device
- Vaccine Screen Changes
- Automatically Import Pharmacies
- Audit Log
- Viewing Secure Messages and requests in the EHR
- Clinical Note Types
- Previous Name and Address
- CCDA Export Subset of Patients
- Additional CCDA Export Data
- Searching for Patients
- Managing Patient Information
- Patient Exams
- Schedule
- Flowsheets
- Patient Intervention and Health Maintenance Profiles
- Case Management
- Orders
- Sending and Receiving Messages
- Reports
- Dragon Naturally Speaking Voice Integration
- Vocabulary Editor
- Diagnosis Director
- Primary Care Features
- E/M Consultant
- Patient Tracker
- Referring Patients
- Referral Reply Letter
- Fax Viewer
- Legacy Audit Trail
- Error Log
- DataShare
- ICD-10 Setup & Training
- CCDA Data Export Guide
- Regulatory Report
Setup and Configuration
In this section we’ll cover the setup and configuration needed to quickly make your system ICD-10 ready. ICD-10 settings are provider specific and must be configured separately for each user.
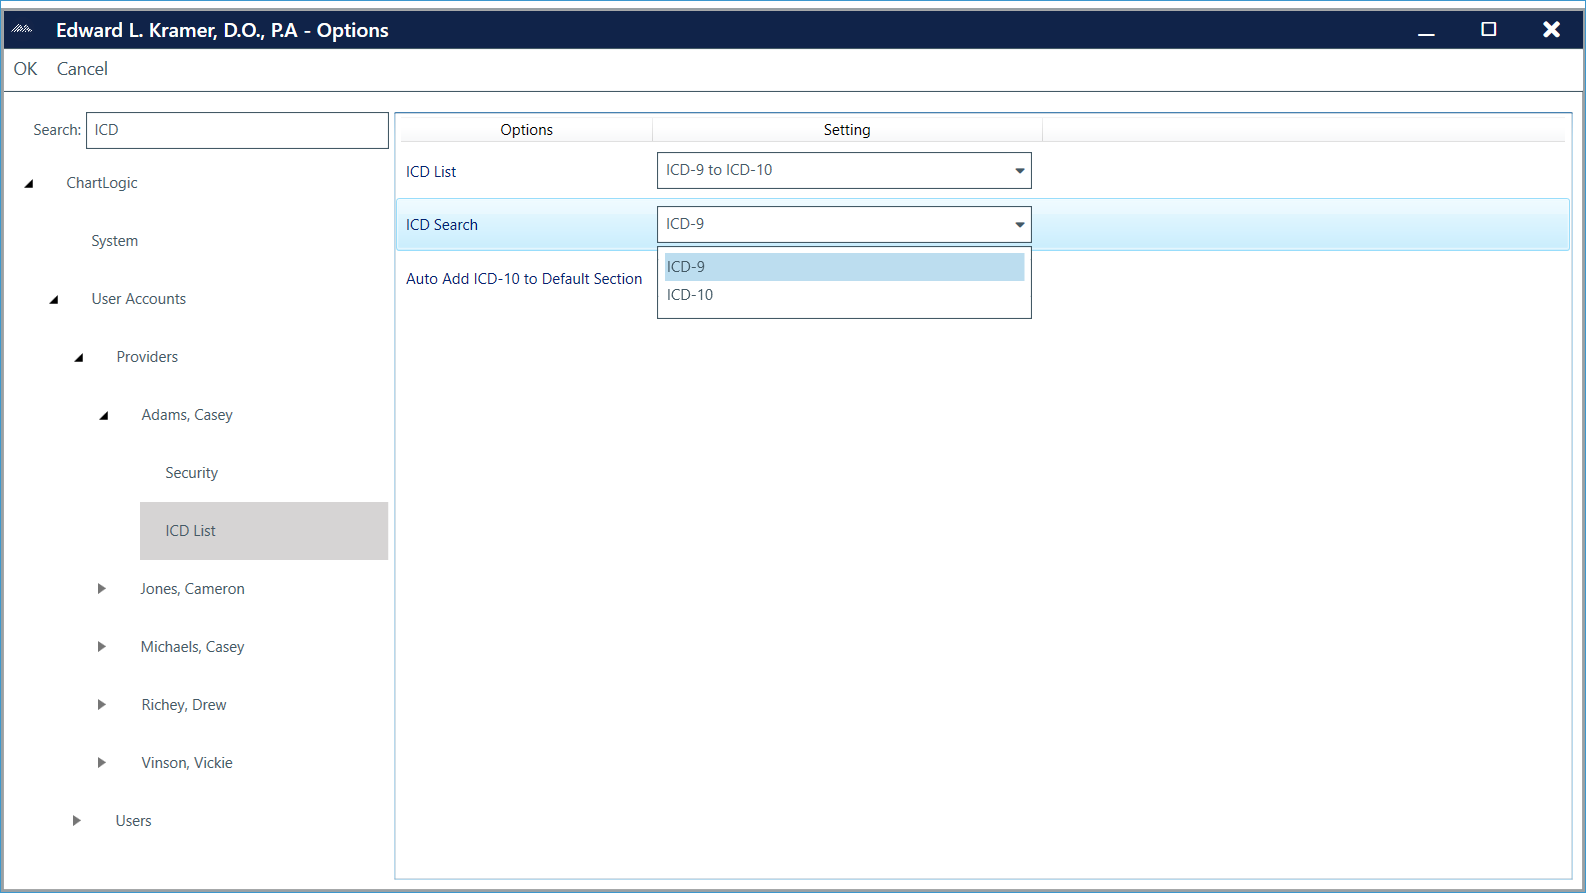
To begin, login as administrator, click Configure – Options and search for ICD. Expand the provider you’d like to configure and select ICD List.

You’ll see three options that need to be configured. The first of those options is ICD List. This option controls which diagnosis code list you’ll see in the superbill. You can select from:
- ICD-9 to ICD-10
- ICD-10
We recommend starting with the ICD-9 to ICD-10, as this will have the least amount of change from your current workflow. This feature allows you to search for a standard ICD- 9 code and have the associated ICD-10 codes displayed and ready to be added to the superbill. It also allows you the option to send ICD-9 or ICD-10 codes from the superbill.
You can also select the ICD-10 option if you are ready to get started right away with ICD-10 coding and don’t need the ICD-9 to ICD-10 code look-up tool or the ability to send ICD-9 codes through superbill. Please note that this option will require you to populate your ICD-10 code list in ChartLogic manually from Configure – Superbill Configuration.

The next option you’ll see is ICD Search. This toggles the default list that will be searched in the superbill. We recommend setting this to ICD-9 if you are using the ICD-9 to ICD-10 look-up tool.
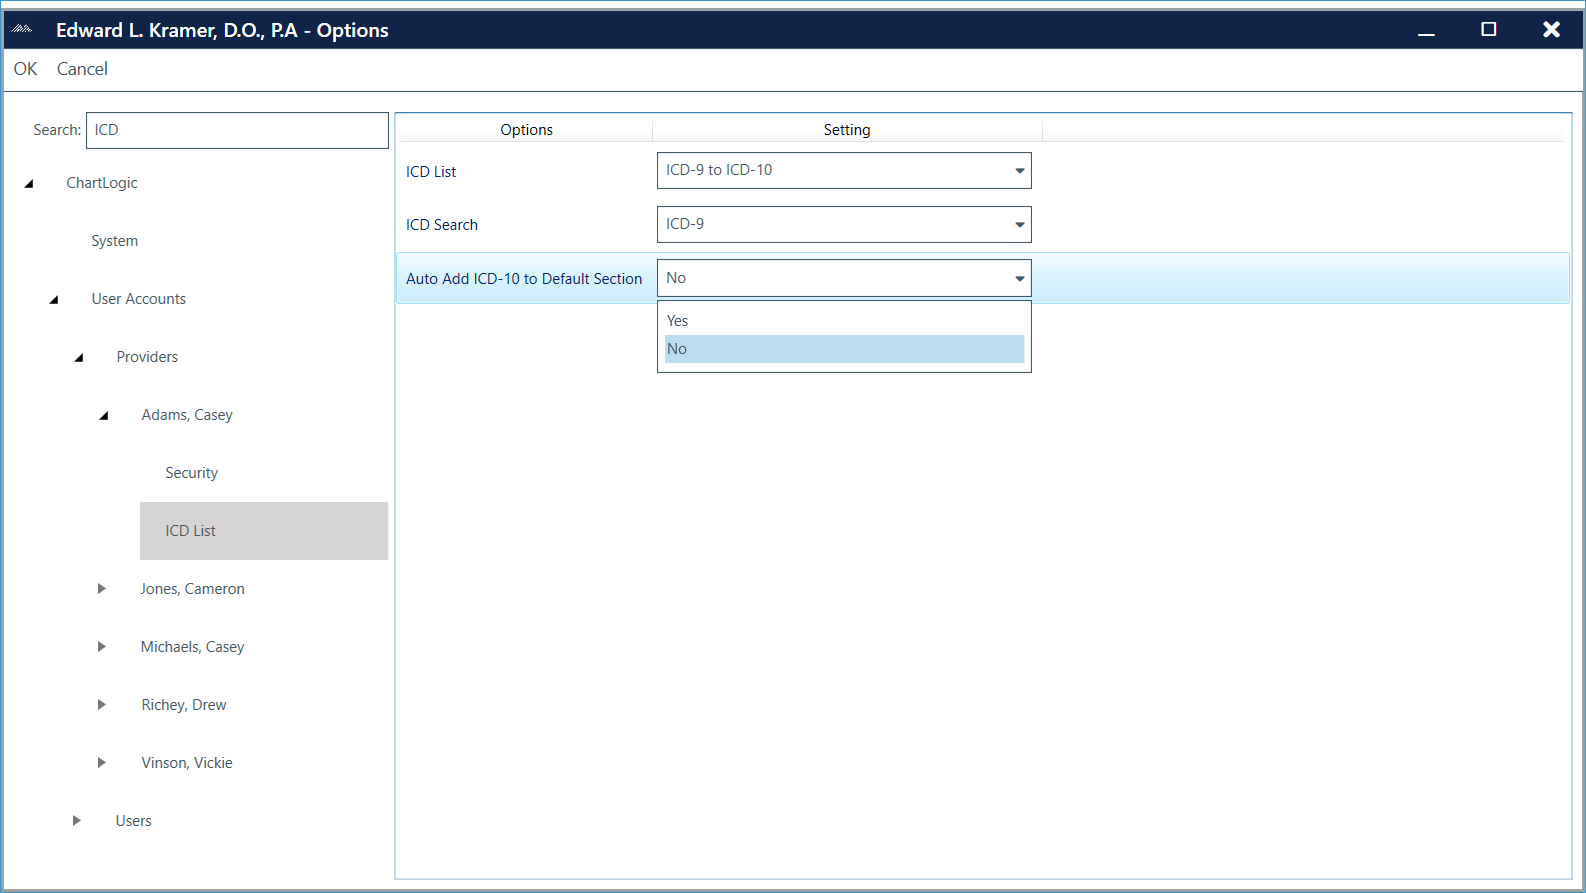
The last option you’ll need to configure is Auto-add ICD-10 to Default section. This is a helpful setting that allows you to populate your ICD-10 list in ChartLogic over time, rather than manually adding all ICD-10 codes prior to using them in the superbill. If set to Yes, ChartLogic software will automatically populate the ICD-10 Default section of the superbill with any ICD-10 codes associated to a saved and finished encounter. Over time, the ICD-10 Default list for your practice will grow and populate automatically, based on the codes used in your practice. You can manage this list at any time by going to Configure – Superbill Configuration and selecting the ICD-10 Default section. If you prefer to configure this list manually, set this option to No and import ICD-10 codes through Configure – Superbill Configuration.
As mentioned above, you can manage ICD-10 codes by clicking Configure – Superbill Configuration. From this screen, you have the ability to add ICD-10 sub-sections and manually populate ICD-10 codes with the same functionality and workflow that you previously used with ICD-9. Select the sub-section or code Add/Delete/Edit buttons to get started.

Once these options are configured, you’ll be ready to start using the ICD-10 features in the superbill.
Superbill Training
In this section we’ll cover how to use ICD-10 features in the superbill. Remember that ICD-10 settings are provider specific and must be configured separately for each user.
To begin, we’ll start from an open encounter in ChartLogic. Select the superbill shortcut on the menu to the right, or go to Billing – Superbill. You’ll notice an additional ICD-10 Section listed on the right side of the Superbill screen. The ICD-10 sub-sections are listed as follows:
- Commonly Used ICD-10
- Default
The Commonly Used ICD-10 sub-section consists of the top 100 ICD-10 codes used at your practice. This list is automatically populated and sorted by frequency of use. This list is helpful to quickly select your most commonly used diagnosis and CPT codes for use in the superbill.
The next ICD-10 sub-section to review is Default. If you set the Auto-add ICD-10 to Default option to Yes, you’ll see this list automatically populate as you begin to send ICD-10 codes with a saved and finished encounter.

To begin populating the superbill, simply search for the appropriate ICD-9 code (assuming you are using the ICD-9 to ICD-10 list feature). You can search by code or description. In this example we’ll search for the description “ankle”. You’ll then notice that the top panel of search results are all ICD-9 codes with a description of “ankle”, while the bottom panel shows the corresponding ICD-10 codes associated to the highlighted ICD-9 code. In this example, 719.47 has three corresponding ICD-10 codes. We’ve selected M25.571 from the bottom panel and added it to the superbill. To get ICD-10 results for a different ICD-9 code from the list, click in the description box and the corresponding ICD-10 codes will populate below for selection.
Notes:
- The superbill must contain all ICD-9 or ICD-10 codes. You cannot send both within one encounter.
- You can continue to use ICD-9 codes by selecting them and adding to the superbill. This will not send an ICD-10 code.
- Be sure to associate all diagnoses with CPT codes, where applicable.
- ChartLogic PM Users: Be sure to associate this encounter to a visit.
Testing
In this section we’ll explain how to test with your current PM vendor for ICD-10 compatibility. ChartLogic PM Users can rest assured knowing that all ICD-10 testing has already taken place and been validated. We are well ahead of the October deadline for our PM users.
To begin, you’ll want to reference the ICD-10 Readiness Packet located here. This packet contains ChartLogic’s ICD-10 Specification document, sample charge files, and a brief explanation of the format and workflow that you can send to your PM vendor to ensure that they are ICD-10 compliant.
Once you’ve verified that your PM vendor is ICD-10 ready, it’s time to send sample ICD-10 data to your PM. To do this, select a sample patient and create a new encounter (typically Sam Sample or similar). Open the superbill and add the appropriate sample ICD-10 codes, as described in the training section above. Add the appropriate CPT codes and associate all diagnoses to CPTs. This will send ICD-10 charge data through the current interface that’s setup to your PM vendor.
At this point your PM vendor will need to validate that they can accept the ICD-10 codes being sent from ChartLogic. We are happy to conduct a scheduled vendor to vendor call in order to work through any issues and ensure that your ICD-10 transition is as smooth as possible.
Connect
1220 E 7800 S, Floor 3
Sandy, UT 84094
Toll-Free (888) 337-4441
