
Now that the Claims files have been generated, they are ready to be transferred via EDI to the clearing houses, which will distribute them to the appropriate payers. The file transfer is a two-way communication, sending out your claims while also retrieving any files that the clearing house has placed in your inbox, such as confirmations and electronic remittances. Perform the following steps to Transfer EDI Files:
- From the Claims menu on the left side of the screen, select Transfer EDI Files.
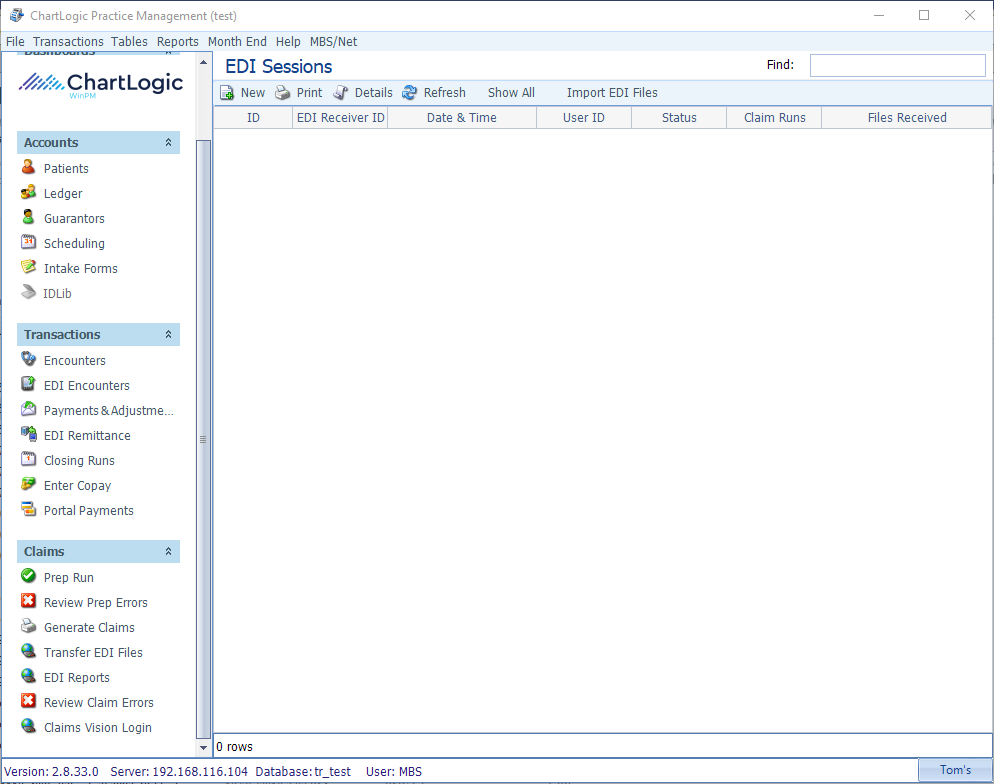
The EDI Sessions screen will appear on the right, listing previous EDI sessions, the date/time they were run, status, and the number of claims sent as well as files received, as shown below.
- Click New.
The Select EDI Receivers dialog box will appear, as shown below.
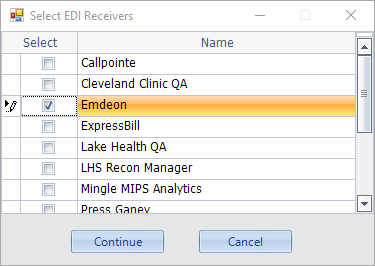
- Check the box in front of the desired Receiver.
Note: Although the screen allows you to select multiple Receivers, we recommend that you only select one at a time due to different transmission methods (GPNet goes via modem/phone line while the rest go via internet).
- Click Continue.
A New EDI Session dialog box with progress bar will appear, as shown below.
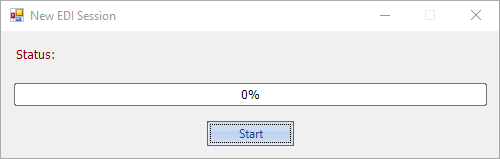
- Click Start.
The EDI Session occurs in the background and takes several minutes. During this time, the system will contact the clearing house, verify your username and password (as maintained in the EDI Receivers table), transmit the claims, and retrieve files from your inbox. Do not close the dialog box until it finishes (you may minimize it and work on something else while it runs). The progress bar shows the EDI Session ID and the percentage finished at any given moment.
When it reaches 100%, the button will change from Running to Done.
- Click Done.
The newly created EDI Session will appear on the EDI Sessions list, showing a status of either Success or Error.
- Double-click on the Session to view the details.
The EDI Session detail screen will appear. A successful transmission looks like this:
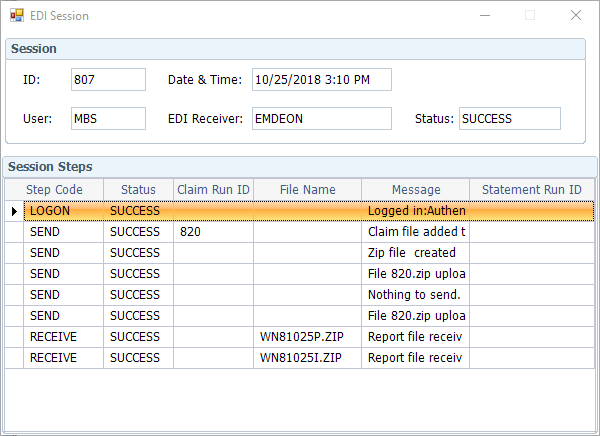
The Session Steps section shows the results of the logon, as well as a list of all files sent and received during the Session. In the example above, no files were sent, but two were received.
A failed transmission looks like this:
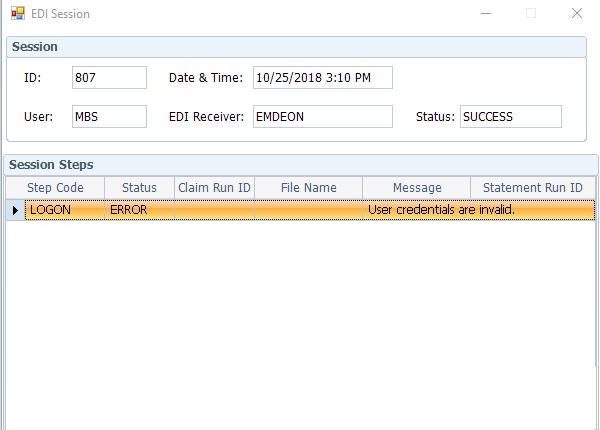
In the above case, the message tells us that the User credentials are invalid, which means that you need to go back to the EDI Receivers table and correct the Username and Password before trying again.
- Repeat steps for each additional EDI Receiver.
Connect
1220 E 7800 S, Floor 3
Sandy, UT 84094
Toll-Free (888) 337-4441
