
Practice Tables Overview
- Practice Tables Overview
- Tables: Practice
- Tables: Practice Sites
- Tables: Facilities
- Tables: Practice Providers
- Tables: Diagnoses
- Tables: Service Categories
- Tables: Services
- Tables: Service Macros
- Tables: CAR Codes
- Tables: EDI Receivers
- Tables: Messages
- Tables: Users
- Tables: Medical Codes>HCPCS – RVU
- Tables: Billing Account Types
- Tables: Employers
- Tables: Insurance Plan Groups
- Tables: Insurance Plans
- Tables: Patient Note Types
- Tables: Referring Providers/Practices/Sites
- Tables: Posting Periods
Before using MBSWin, you will first have to set up your Practice Tables, which are the building blocks for your practice’s database. They define everything having to do with your practice and how it operates, such as practice sites, providers, diagnoses, services, insurance plans, and much more.
Many of the tables are straightforward, requiring simple information, such as addresses, phone numbers, ID numbers, etc. Others will require more strategic thought because they will determine, for instance, how things are grouped together for reporting.
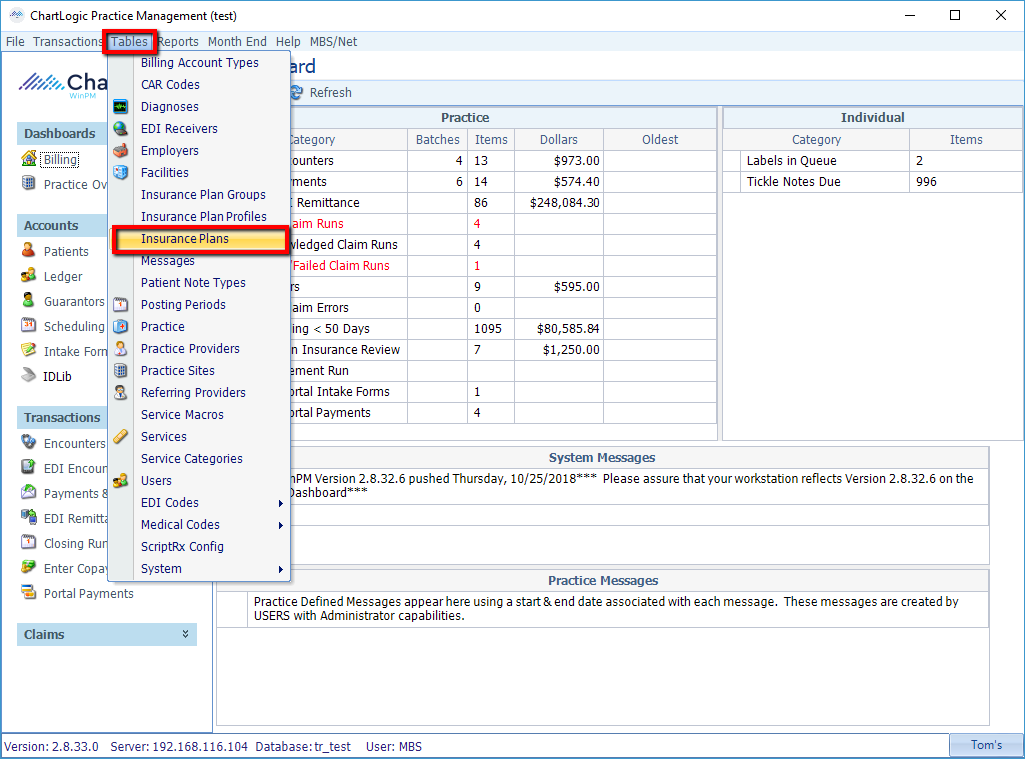
Tables are accessed via the Tables menu at the top of the MBSWin Billing Screen.
Although you will set up your tables before starting to use MBSWin, they can be updated at any time afterward as needed, such as adding new entries, changing existing entries, or deactivating existing entries.
While each table is unique in terms of the type of information it contains, navigation is the same for all tables. To bring up a table, simply select it from the Tables menu, as shown above. For this example, let’s look at the Insurance Plans table.
Table View

When you pull up the table, it shows all of the active entries, sorted by ID.
- Sort: To change how the list is sorted, click on the heading by which you wish to sort. For example, clicking on the “Name” heading will sort the list in ascending alphabetical order by Name. Clicking on the “Name” heading again, will sort it in descending order. For secondary sorting, shift+click on a different column heading.
- Find: In a long list such as this one, you can narrow your search by typing characters in the Find box at the top right corner of the screen. As you type, the list will start narrowing down to all entries containing the combination of characters anywhere in any of the fields.
- Navigation: You can use the Tab key to move down the list or use the up/down arrow keys to move up and down the list.
- Show inactive: By default, only active entries appear on the list. Clicking on the Show Inactive button on the toolbar at the top of the table expands the list to include inactive items as well as active ones.
- Form view: Double-clicking anywhere on a row (or selecting a row and then clicking the Details button) opens up the form containing all of the information for that entry, allowing you to review or edit the entry, as shown below.
Form View
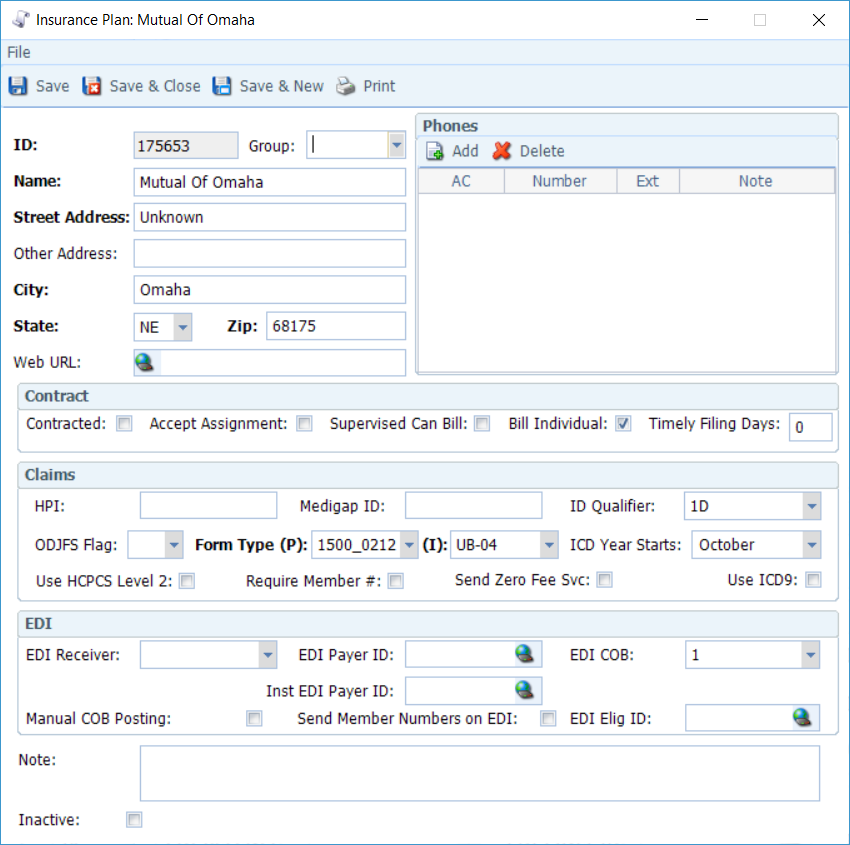
- Required fields: All fields labeled in red are required, and the record cannot be saved until they are populated with valid data. These are the bare minimum data required to save the entry, but effort should be made to populate as many of the other fields as possible with the information you have available. Complete information reduces data entry and formatting errors within data entry tasks.
- Entry errors: Certain fields have specific requirements for how data is entered. If you enter invalid data (such as 4-digit zip), a red circle with an exclamation point will appear to the right of the field, which will explain the error upon hovering the cursor over it (see below).

- Pull-down, search, and details icons: Some fields are free-form data entry, while others require a selection from a list of valid choices. If the list is short, there will be a drop-down arrow on the right side of the field, which you can simply click on and make your selection. However, if the list of choices pulls from another table, there will be a search icon (magnifying glass) on the right side of the field and a details icon on the left (see below).
![]()
Clicking the search icon will take you to the relevant table, from which you can perform the “find” function to locate your selection. Clicking the details icon will pull up the individual form for the selection, allowing you to review the information it contains.
- Phone numbers: Forms allow for multiple phone numbers, maintained on a table within the form (see below).
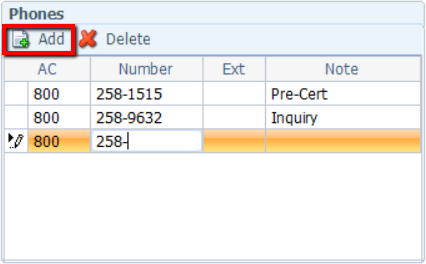
Clicking the Add button creates a new row, allowing you to enter a new phone number. You may type the phone number with or without the dash, the system will auto format it with the dash when you tab to the next field. You can also delete a phone number by clicking on the desired row to select it, and then pressing the Delete button.
- Zip codes: When using a Zip+4 in the Zip field, you do not have to type the hyphen; the system will auto format it when you advance to the next field.
- Dates: The system auto formats dates to mm/dd/yyyy, but they can be entered in a variety of ways: mmddyyyy, mm.dd.yyyy, mm-dd-yyyy, or mm dd yyyy. You can also use the pull-down arrow and select the date from a calendar, but this may be inconvenient for non-current dates, such as birthdates, because you must scroll through individual months to get to the appropriate month/year (see below).

- Save, Save & Close, Save & New: There are three different ways to save a form, depending on what you are planning to do next (see below).

All three buttons cause the form to be saved. The differences are as follows:
- Save: Form remains open after saving. Use when you still have work to do on the form.
- Save & Close: Form closes after saving. Use when you’re done with the form.
- Save & New: Current form closes, and a new blank form opens. Use when adding multiple records to the table.
Connect
1220 E 7800 S, Floor 3
Sandy, UT 84094
Toll-Free (888) 337-4441
