New Order
Once logged into ChartLogic EMR, there are a few ways to create a new lab order.
- Patient Menu
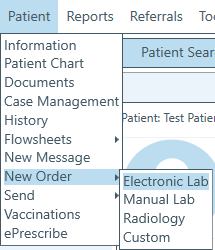
- From the Main screen after selecting a patient a user can click on the Patient Menu | New Order | Electronic Lab.

- From the Main screen after selecting a patient a user can click on the Patient Menu | New Order | Electronic Lab.
- Patient Encounter
- A user can order a Lab through a patient encounter by clicking on the New Order | Lab from the left side of the encounter screen.
Lab Order Screen
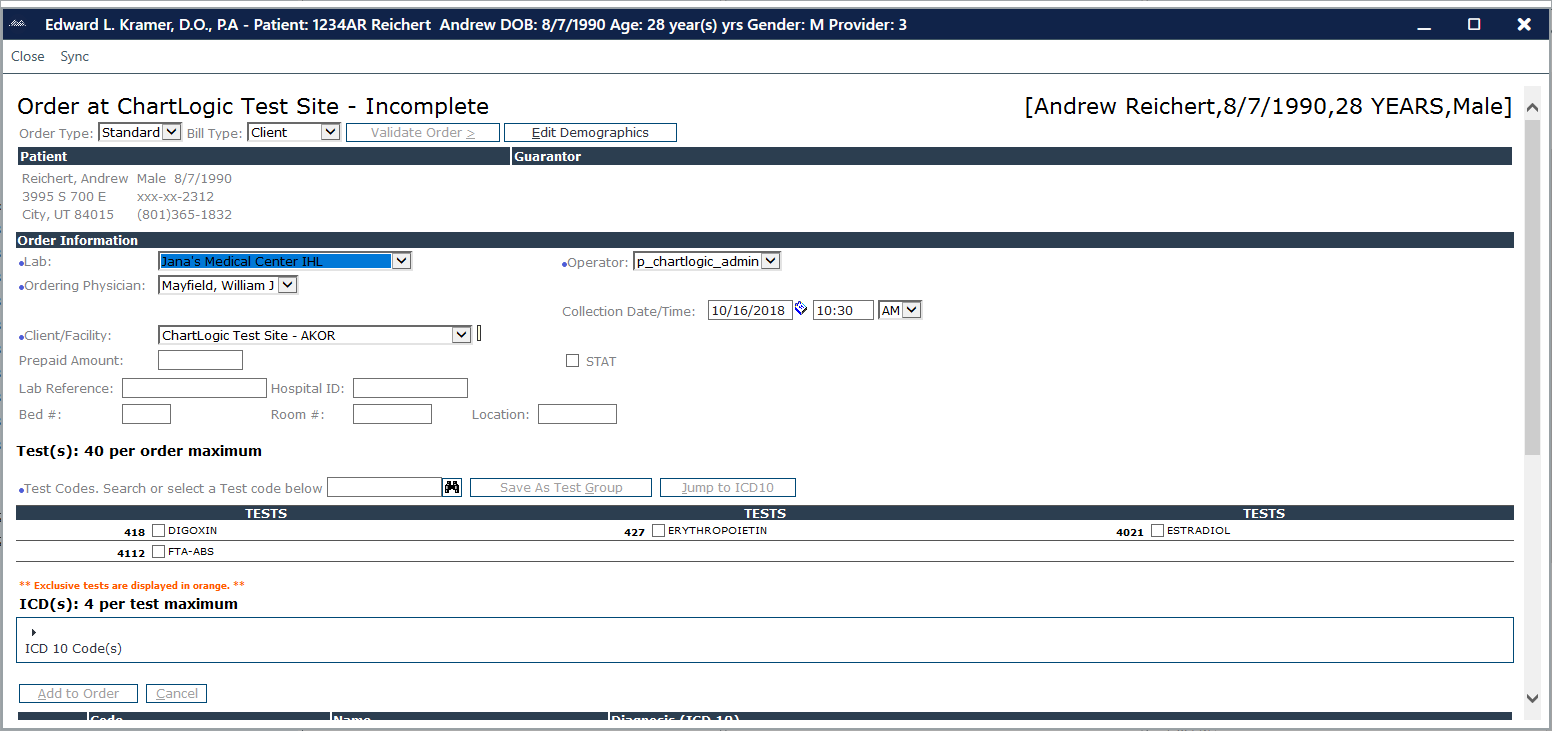
A new screen will open with the Patient and Provider from the main screen selected in the ordering system.
 A complete order includes a test(s) and diagnosis codes. Test codes are used to designate the laboratory tests ordered by a caregiver in the order while diagnosis codes are used to specify the patient’s condition and/or symptoms that justify performing those tests.
Test Codes
Your most common tests appear on the order with check boxes next to them. You can select multiple test codes by checking the appropriate boxes or you can enter them in the Test Codes field separated by commas or spaces. (For instance: HWMDL8, HWMDL9). When using the second method, press the Enter key to select a test code and include it in the order.

ICD-10 Codes
Your most common ICD-10 codes appear on the order with check boxes next to them. You can select multiple ICD-10 codes by checking the appropriate boxes or you can enter them in the ICD-10 Codes field separated by commas. (For instance: 770.83,770.3,773.3). When using the second method, press the Enter key to select an ICD-9 code and include it in the order.

Validating the Order
Once you finish entering test and diagnosis codes, you are ready to validate the order.
Click the Validate Order button or use the shortcut key “Alt >” to validate and save your order. If all the data has been properly entered, a completed printable order appears on the following screen.
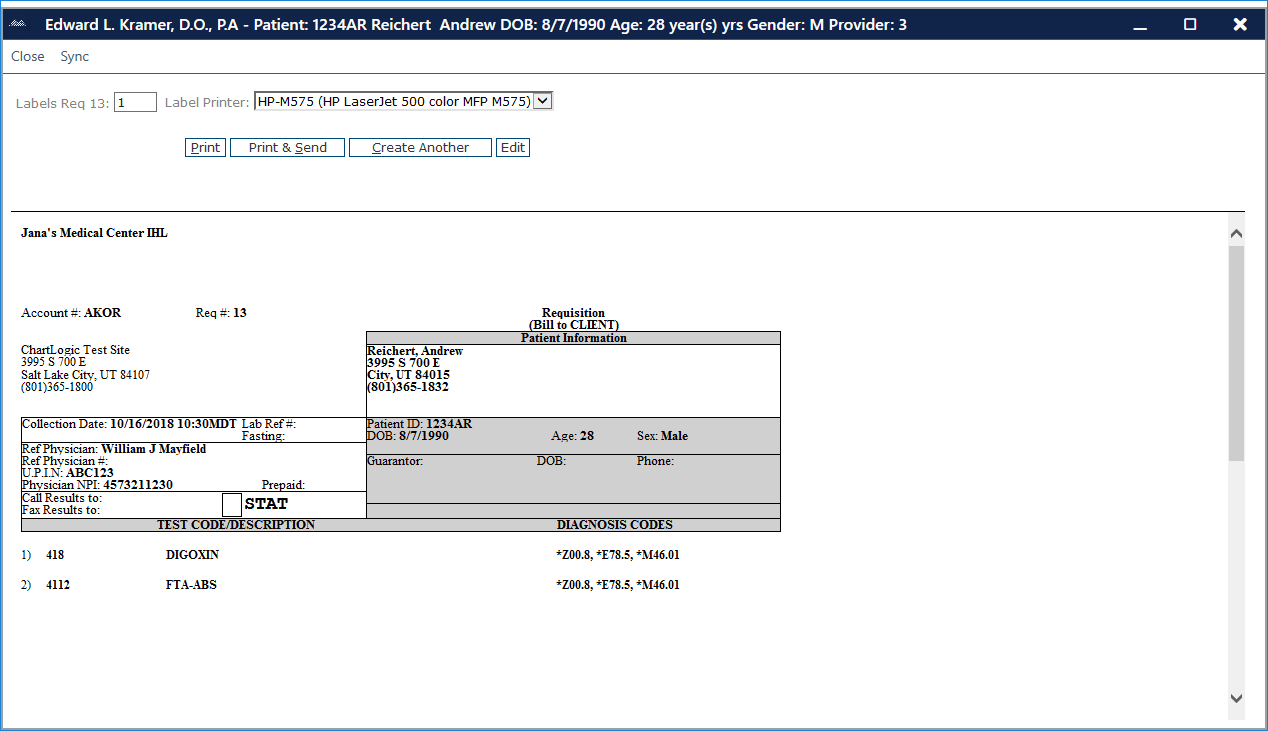
 The Requisition Print Preview screen appears when a new order is validated and saved or when you access a requisition and click the Print button.
This electronic form allows you to verify all the information on a requisition prior to sending it to the lab.

A small box at the top of the screen allows you to choose the number of labels to print for the order.
Keep in mind that not all labs support the use of labels. When you click the Print button, the Windows Print dialog box appears. The Print dialog box shows you which printer is currently selected to print orders. You can select the number of copies in the area indicated. You may choose NOT to print by clicking the Cancel button. This will not cancel the order, instead it will return you the print summary screen.
When you click the Create Another button, you will return back to the order summary screen where you can generate another order for the patient.
Clicking on the Edit button will return you to the order summary screen where you can update the order information.
Please note: Once an order has been sent it you can no longer edit the order from the Print summary screen.

