
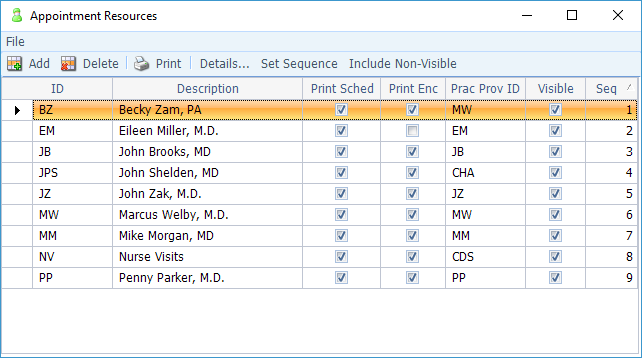
Appointment Resources
Enter information for any resource that needs to be reserved for appointments (i.e. doctors, nurses, PAs, therapists, procedure rooms, equipment, etc.).
- Small, portable equipment that doesn’t specifically need to be reserved (i.e. EKG) should not be entered here.
- For flexibility in scheduling, a nurse does not need to be a specific person, but rather a generic Nurse1, Nurse2, etc.
Note that each appointment resource has a menu of options on the left-hand side of the screen (see screenshot below). The first is the Information screen, which contains the following fields:
- ID: A key or ID for the resource (i.e. provider’s initials or abbreviation of word.)
- Description: Either the provider’s name, or the name of the resource (i.e. Procedure Room.)
- Practice Provider: Select from the drop-down (Practice Provider tables from the Billing Tables may not have been created yet – this field may be filled in on the table once the Practice Provider table is defined.)
- Sequence: Will populate automatically when you save, but can be re-sequenced to arrange the scheduling Resources defined in the desired ascending order on the scheduling grid.
- Check boxes: Print Schedule includes Resource on scheduling report; Print Encounters allows encounter forms to be generated for this Resource; Include on Resource List can be unchecked to exclude from resource list on the main schedule grid when the resource no longer needs to be viewed.
- Click Save to activate the rest of the menu items on the left-hand side of the screen.

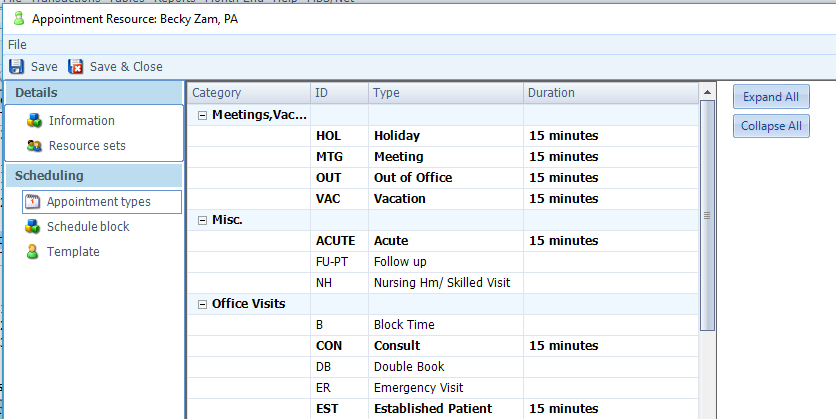
Appointment Resource (Appointment Types)
Now that you have created and saved your resource, the next step is to assign the appropriate Appointment Types, as well as the duration for each type. The length of time can be different for each Resource. In our example, both Dr. Welby and Dr. Kildare have New Patient appointments; Dr. Welby takes 30 minutes, whereas Dr. Kildare only takes 15 minutes for this Appointment Type.
- Click on Appointment Types from the menu on the left of the Resource’s information screen.
- Click the “Expand All” button to see all appointment types within each category.
- Click on the Duration field to the right of each relevant Appointment Type, and then type in the desired duration (if you simply type in a number, it defaults to minutes, but you can also type in durations in other denominations, such as hours or days). Only fill in Duration for the Appointment Types the selected Resource actually performs.
- Durations are not needed for Administrative types, as these change with each use.
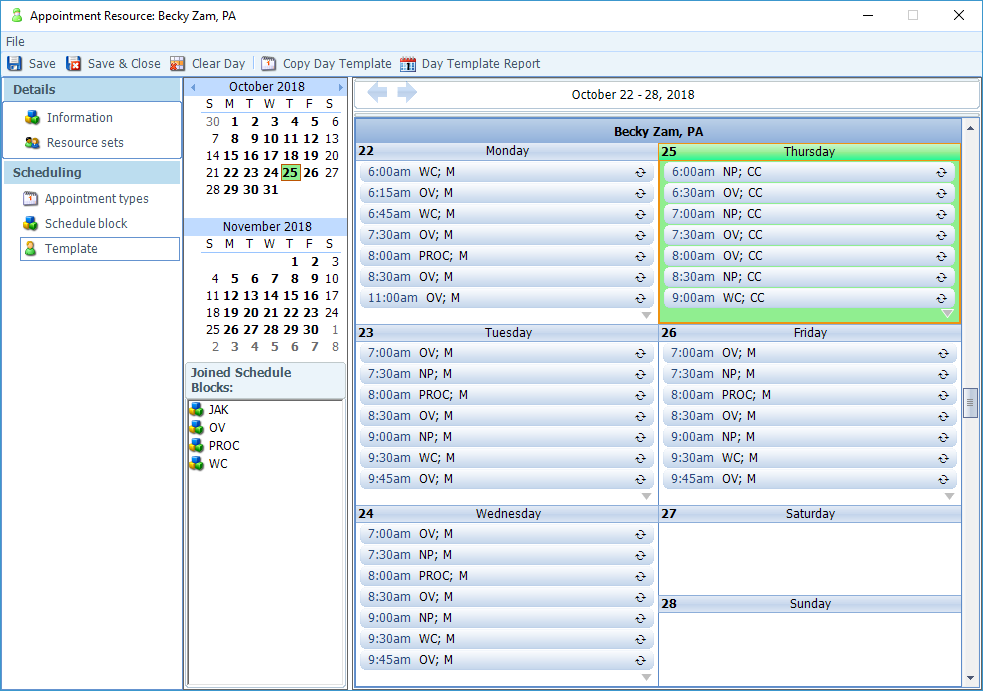
Appointment Resource (Schedule Block)
Now that the Schedule Blocks are defined, select the blocks that are relevant to each Resource. The example below shows Dr. Welby’s selected Schedule Blocks.
- Click on Schedule Block from the menu on the left of the Resource’s information screen.
- From the list of Available Schedule Blocks on the left, double-click on the relevant blocks to add them to the list of Joined Schedule Blocks on the right.
- Clicking on a Schedule Block makes its details appear at the bottom of the screen.
- The New Schedule Block button at the bottom right corner of the screen allows you to create a new Schedule Block on the fly if another block is needed to complete this resource.

Appointment Resource (Template)
Now that you have selected all of your Resource’s relevant Appointment Types and Schedule Blocks, you are ready to create a Template of their work schedule. What the Template does is map out their appointment calendar with respect to what types of appointments they will take at what site and at what time and date. In turn, this controls the Appointment Finder, so that when you ask the program find the first available New Patient appointment, for example, the system will search only those time slots that contain the New Patient Schedule Block.
The first step in creating a Template is to map out the Provider’s week on paper, answering the following questions for each day:
- At which location is he/she working?
- During which hours will he use each Schedule Block?
- Does this pattern repeat on other days as well?
- How far into the future will this pattern go?
For our example, Dr. Welby keeps the following weekly schedule: Monday/Wednesday/Friday (Main office):
- 9:00-11:00 – New Patients
- 11:00-11:30 – Procedures
- 11:30-12:00 – Office Visits
- 1:00-1:30 – Office Visits
- 1:30-2:00 – Procedures
- 2:00-4:00 – New Patients
- 4:00-5:00 – Office Visits
Tuesday (Main office in the AM, Elm office in the PM):
- 9:00-11:00 – New Patients (Main)
- 1:00-4:00 – New Patients (Elm)
- 4:00-5:00 – Office Visits (Elm)
Thursday (Elm office):
- 9:00-11:00 – New Patients
- 11:00-12:00 – Office Visits
- 1:00-4:00 – New Patients
- 4:00-5:00 – Office Visits
When finished, a week’s Template as described above will look like this:
The following is an example of how one of the Template Schedule Blocks (M/W/F, 9-11AM, New Patient) is set up. The fields are self-explanatory.
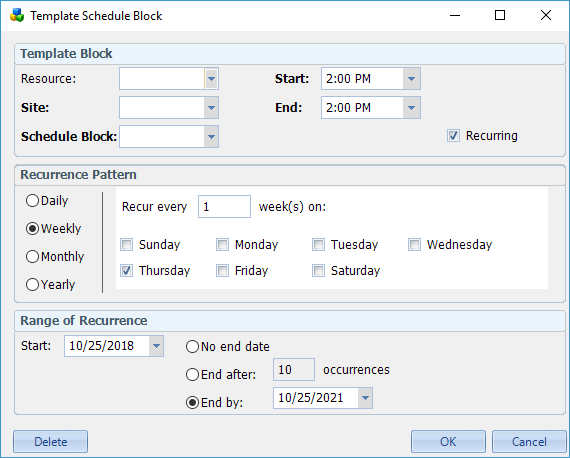
Repeat this procedure for each Schedule Block within the week’s template. By using the Range of Recurrence to whichever point in the future you wish, you should be able to template one week and then let every block within that week recur indefinitely into the future or to a specific end date.
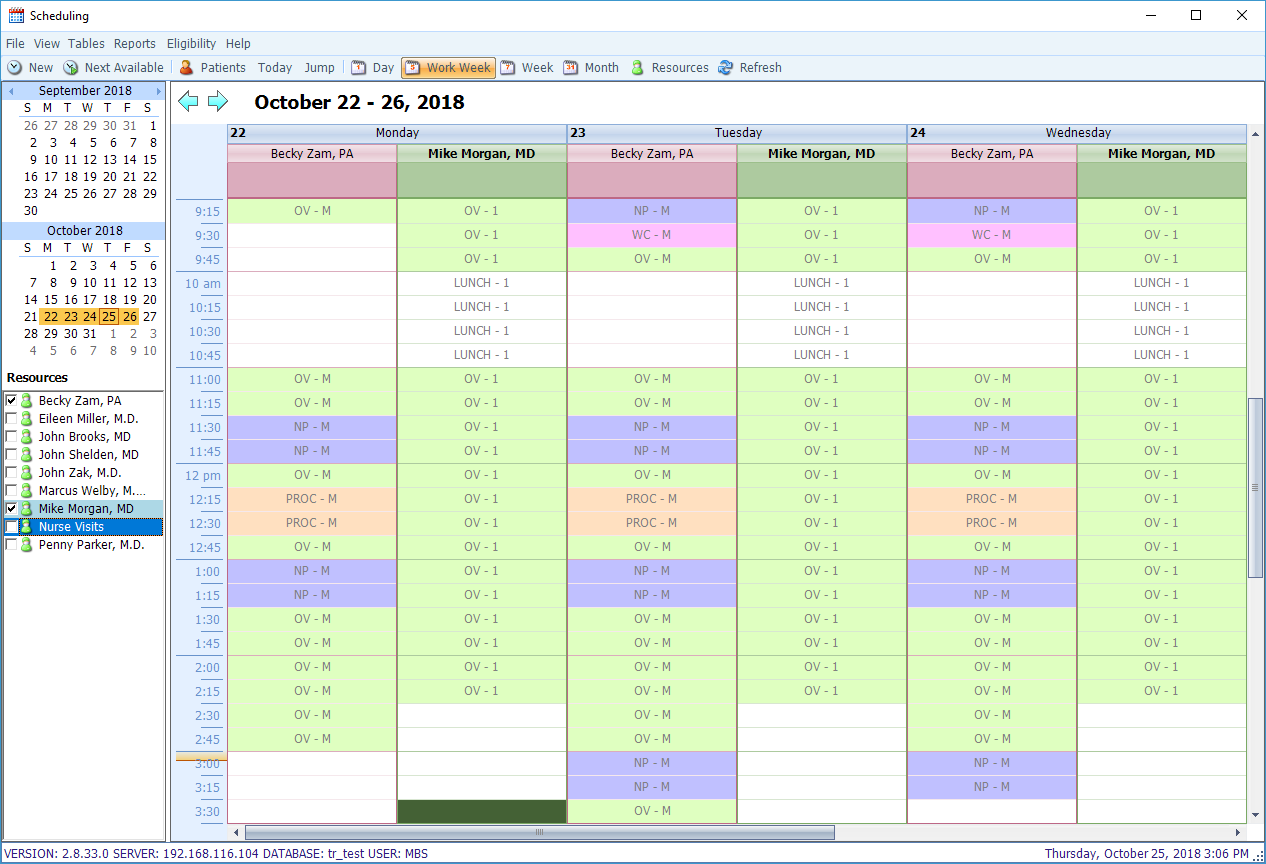
Once you have created the template for one Resource’s schedule, move on to the next Resource and complete the process again, starting with creating the Resource, assigning the appropriate Appointment Types and Schedule Blocks, and then creating the Schedule Block Template. Once finished, your appointment calendar should look like the example below, showing where each Resource is during certain blocks of time and the types of appointments for which they are available.
Connect
1220 E 7800 S, Floor 3
Sandy, UT 84094
Toll-Free (888) 337-4441
